Update a NetSuite record (Using SignNow Smart Templates)
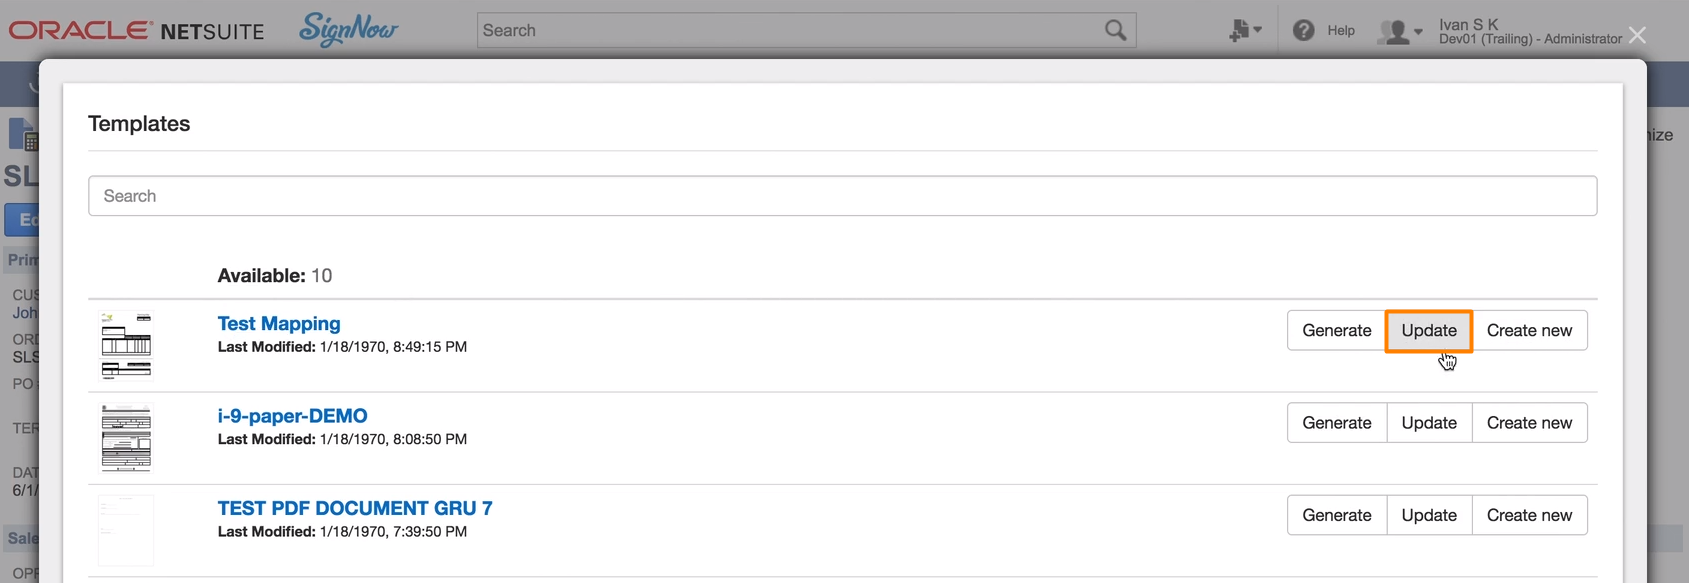
- Select SignNow Smart Templates on your NetSuite record page and click Update next to the template you would like to use.

In Advanced Binding, add the recipient’s email address and go to the Mapping section.
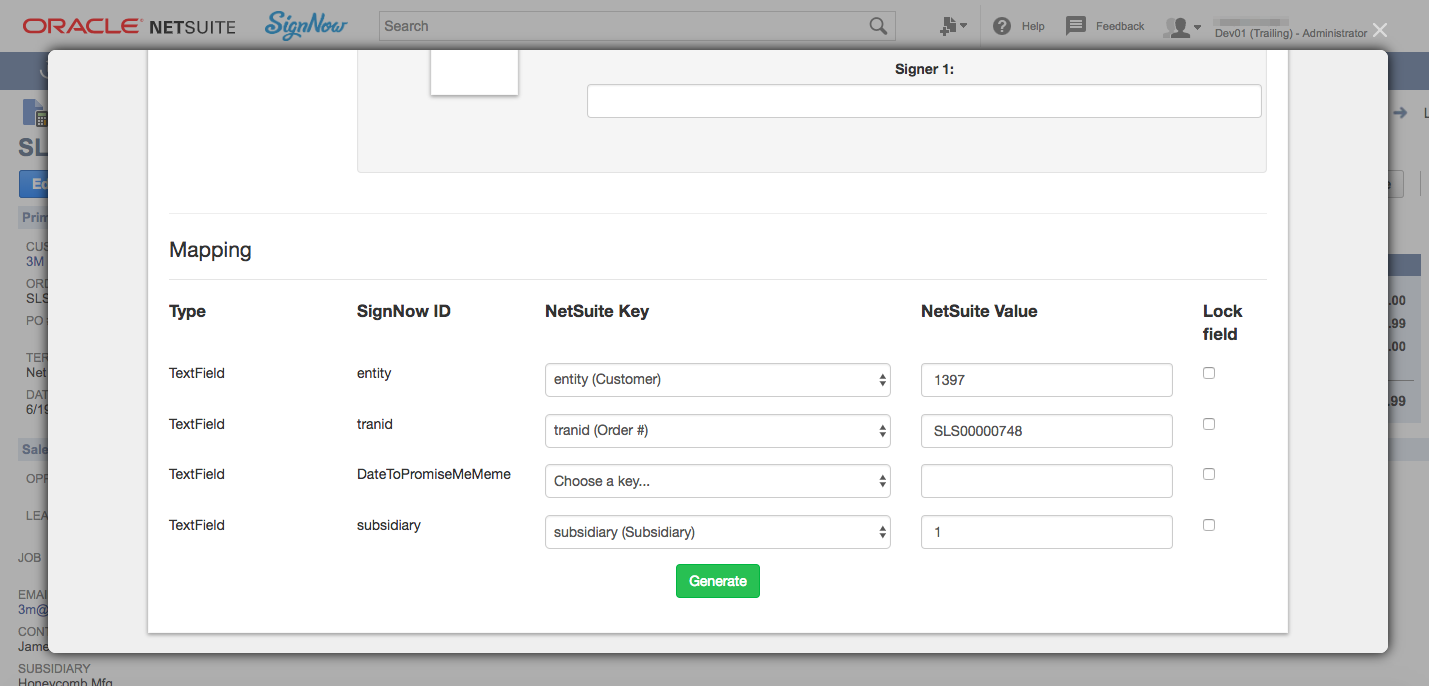
At this point, you get to select what fillable SignNow fields on your PDF will be used and what NetSuite fields they will update for the record you’re working in.
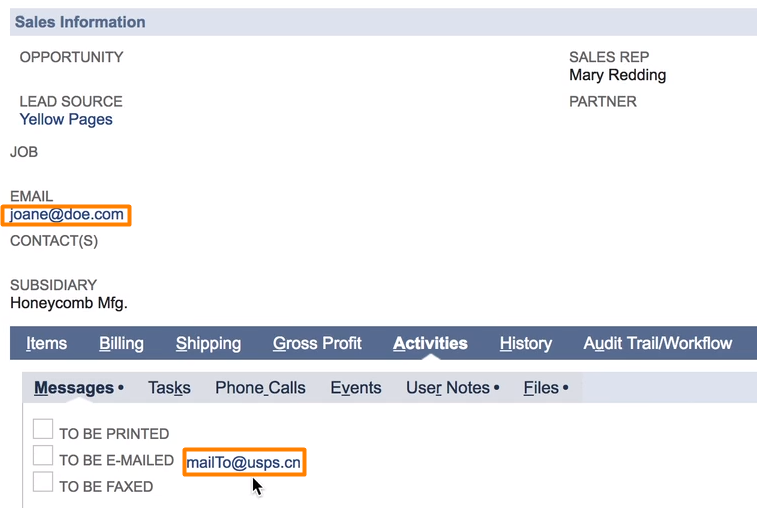
Click NetSuite Key next to the SignNow ID of the fillable field you need. In the dropdown, check which field in the related NetSuite record is bound to this particular SignNow field in your PDF. In this example, Signnow field custbody14 is bound to custbody14 in the Email section of the record Sales Order SLS00000746.

You can bind the SignNow field with any other NetSuite field in this record. Just remember: when you select another NetSuite field in this list, you’ll need to come back to the template in your SignNow account and edit the Unique Field Name of this particular SignNow field. It has to be identical with the NetSuite Field ID, otherwise the bind will be broken.
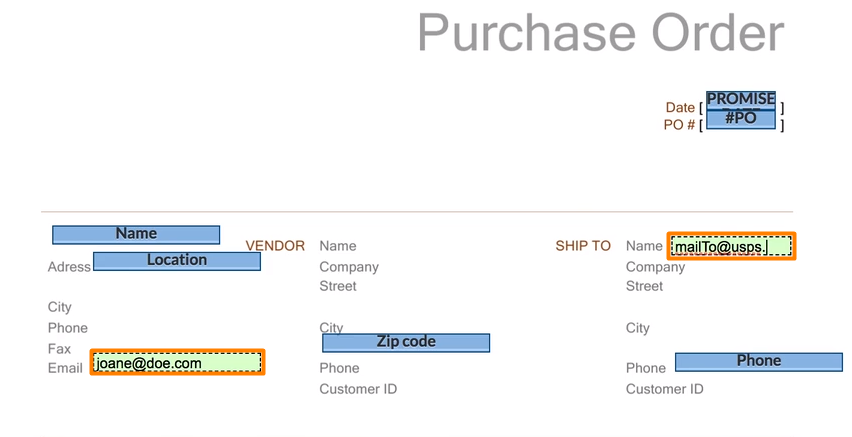
The NetSuite Value may be prefilled, as in this example, or empty - it doesn’t matter. When recipients open the generated PDF, they can erase the existing data and type in these fields to provide the correct information for your NetSuite record.

If you don’t want to allow editing for any of these fields, check the Lock field box next to it.

You may hide the fillable fields or make them visible - it’s your call. Check the box under Mapping, if you incline to hide the fillable fields. Keep it empty, if the fields should be visible.
Once all SignNow and NetSuite fields have been bound, click Generate.
In your SignNow account, the generated PDF will appear with a tag Waiting for Others.

Your recipient should receive an email with a link to open the generated document.

By clicking Open Document, the recipient will see the generated PDF in the SignNow editor and provide the information in SignNow fields. To save changes, the recipient should click I’m done in the dialog window and then Done in the editor.

When the PDF has been filled out and signed, you’ll receive two notifications. One in SignNow: the PDF will be tagged Signed, following the notification email. If you open the signed PDF, you can see that no fillable fields are available and all the required data is provided.

The other in NetSuite: a confirmation message in the record. Refresh the page and you’ll see the designated NetSuite fields updated. The signed PDF is also saved in Files within this record.


Updated over 6 years ago
