Send for Signature
Click Send for Signature in any record to turn it into a PDF that can be emailed and signed. SignNow enables you to add fillable fields to the document, so that recipient(s) could add their initials, signature, and date. You can edit, add, or remove the fields before sending.
- Click Send for Signature while viewing or editing the record.
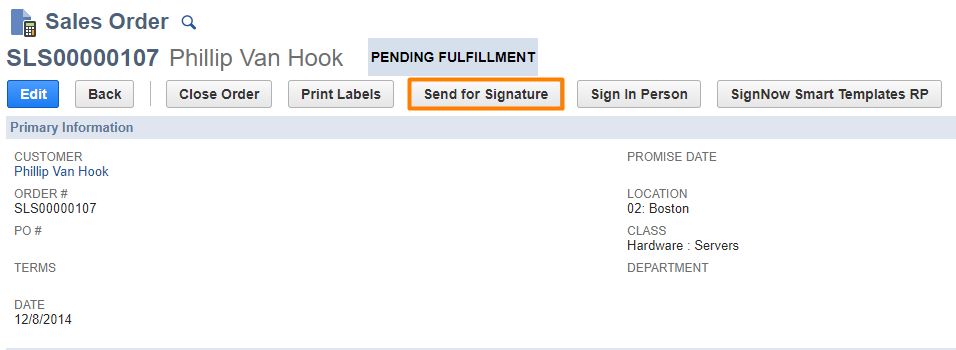
Send for Signature button in a Sales Order
Note!
If you can't find this button, contact your NetSuite administrator.
- Give a name for your document in the next window and hit OK.
If you’d like to use one of the previously created Advanced PDF/HTML templates from your NetSuite account, click Use Advanced Templates and select a template.
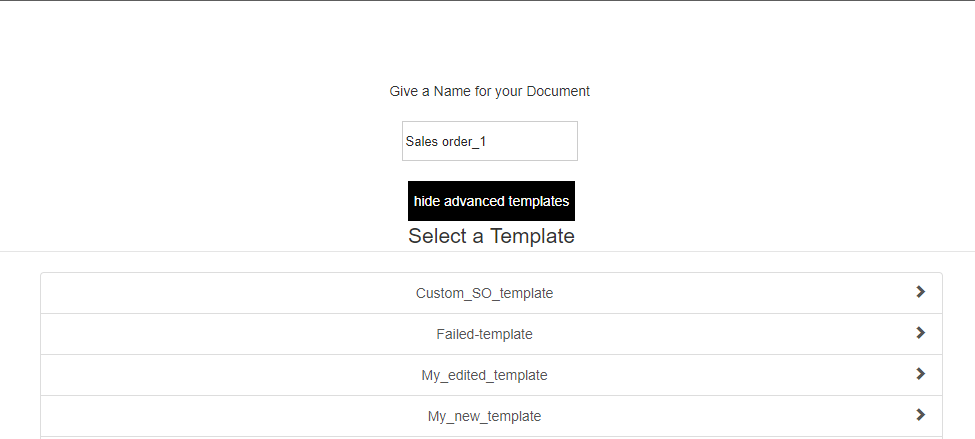
Select an Advanced PDF/HTML template to generate a document with a specific layout
How to use Advanced PDF/HTML templates with Send for Signature
Administrators or employees with eqiuvalent level of access rights comprise a separate list of Advanced templates in a specific record type. This record type is installed with the SignNow bundle. Learn how to make a list of Advanced PDF/HTML templates from these step-by-step guidelines.
The generated PDF opens in the SignNow editor. Depending on the record type and its status, Signature, Name and Date fields might be added automatically.
- Click anywhere on a document to add a fillable field. When you are ready to send this document for signature, click Done.
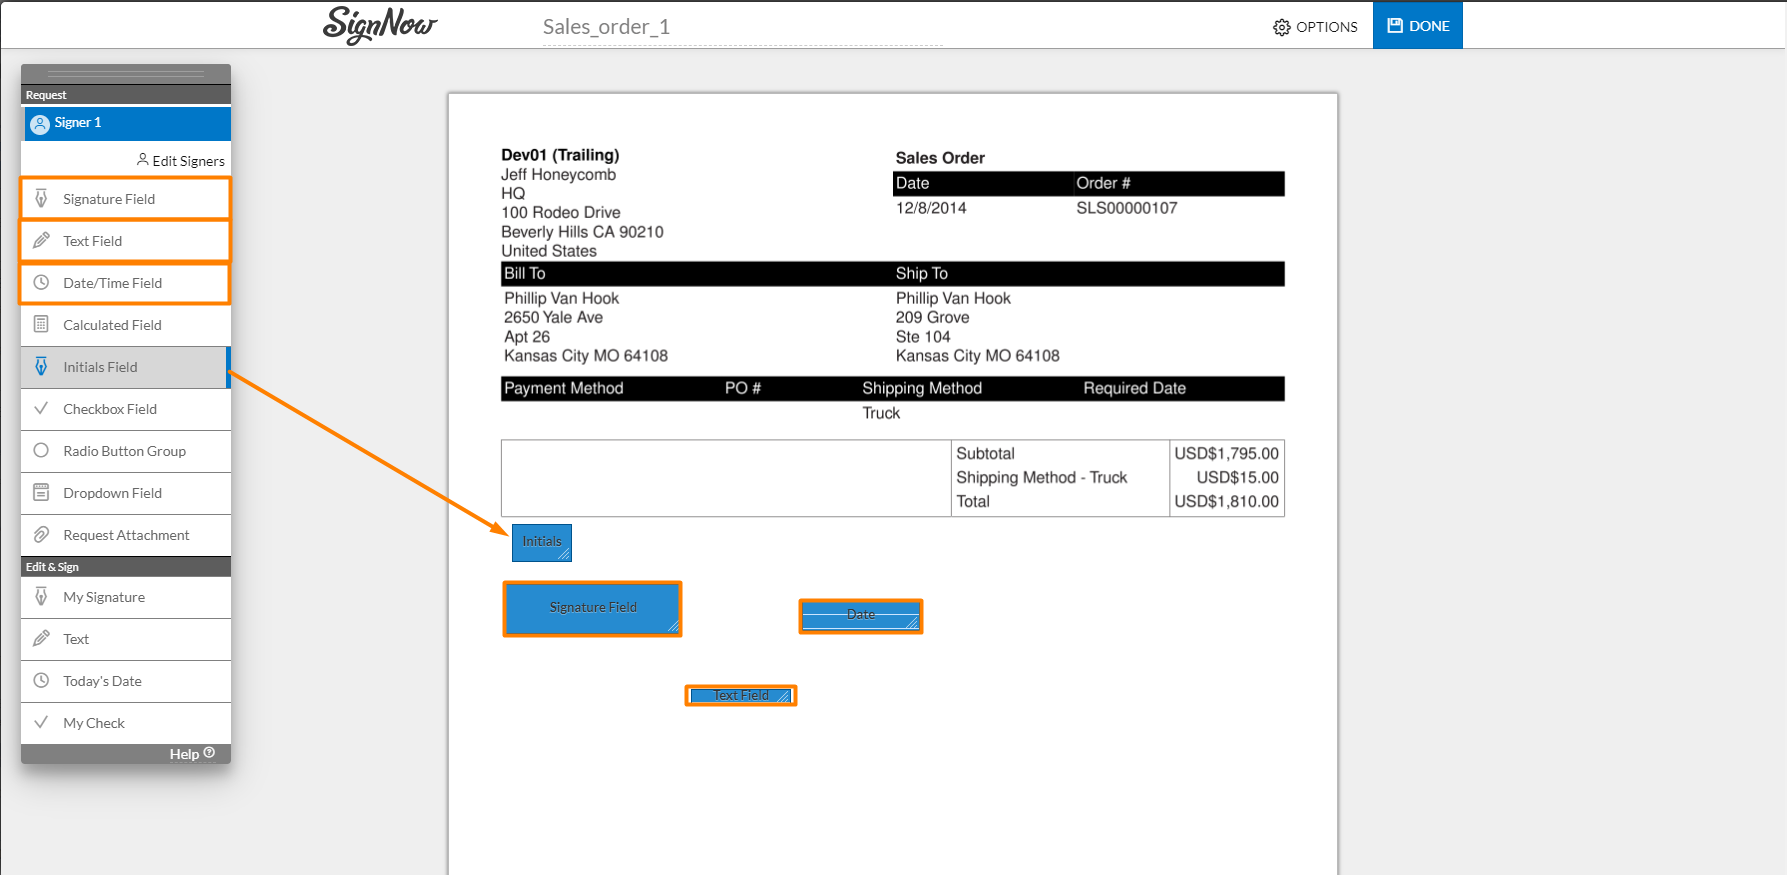
How to add fillable fields: drag them from the list on the left and drop them anywhere on the document.
SignNow University
More on: What you can do with fillable fields in SignNow, how to customize a Signature field, and how to edit signers.
- Add your recipient’s email address in To:.
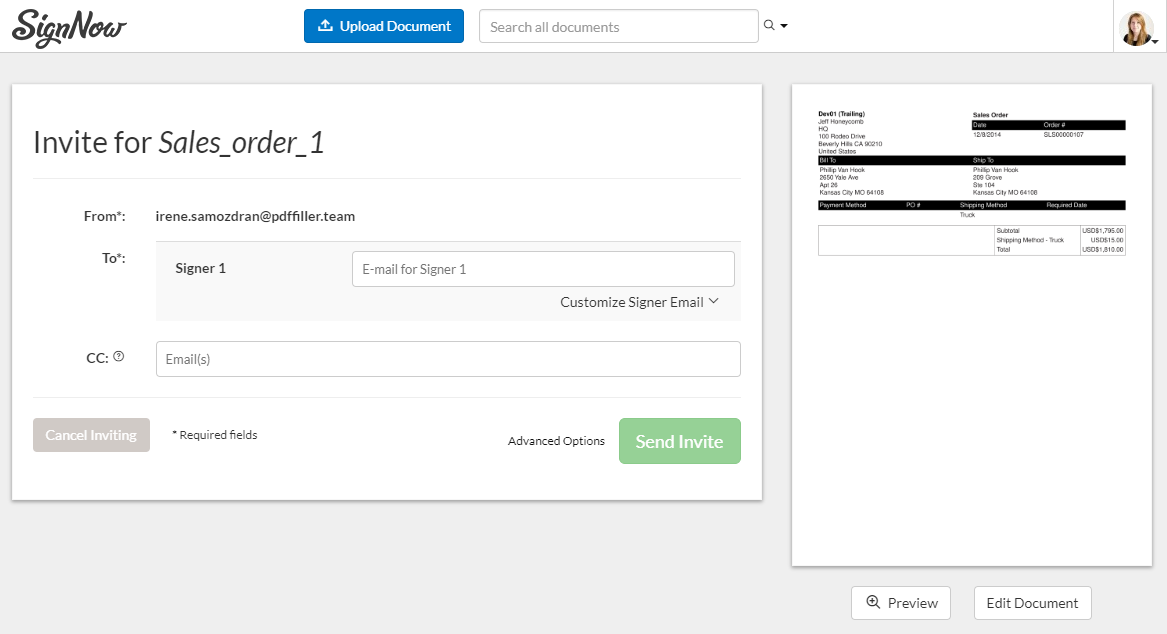
Sending the generated document
- Customize Signer Email: click to edit and personalize the subject line and message as much as you like.
- CC anyone else who needs visibility into the signing process. However, only assigned roles will be able to sign your document.
- Advanced Options: click to set an expiration date, protect your document with a password or schedule reminder emails. The expiration date can be extended to the maximum of 180 days.
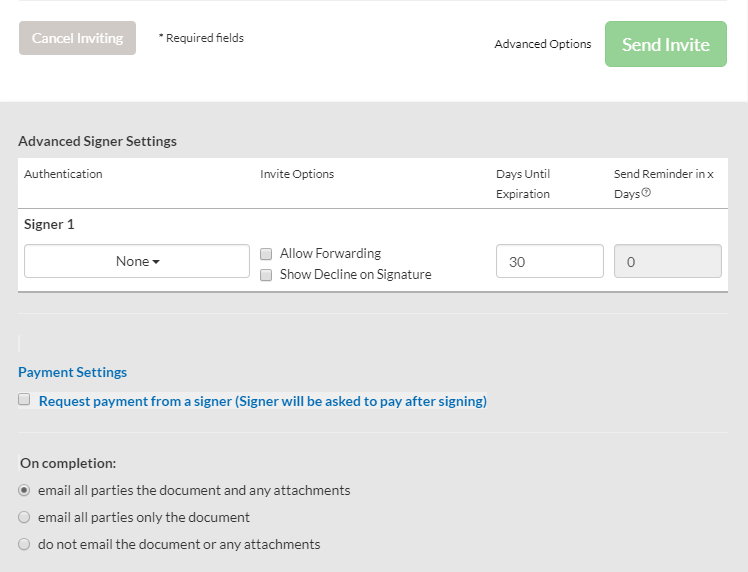
Advanced options: expiration date, reminders, forwarding, payment settings
- Allow Forwarding: check to allow the recipient the option of forwarding your email to someone else.
- Show Decline on Signature: if the recipient declined e-signing, it will say so in the signature field upon the document return.
- Authentication: set a password for your document, or have a password automatically generated and sent to your recipient as a text message or phone call.
- Payment Settings: check to request payment from a signer. Provide the email address of the payment provider, select the currency, payer and type the amount.
- Click Send Invite when all the changes have been applied.
Both you and the recipient get notification emails. Recipients don’t have to register at SignNow to sign the document. A step-by-step wizard will carefully guide them through the process. As a hint, you can also share a link to this video.
Once the document is signed, you receive a notification email. The signed PDF returns to your SignNow account and to the NetSuite record it was sent from - you’ll be able to find it under the Files subtab.
Record Print Form
You can also customize the print layout for a record in NetSuite before sending a document for signature. Simply go to Customize > Customize Form (1) and select the Advanced PDF/HTML template (2) to generate a document from.
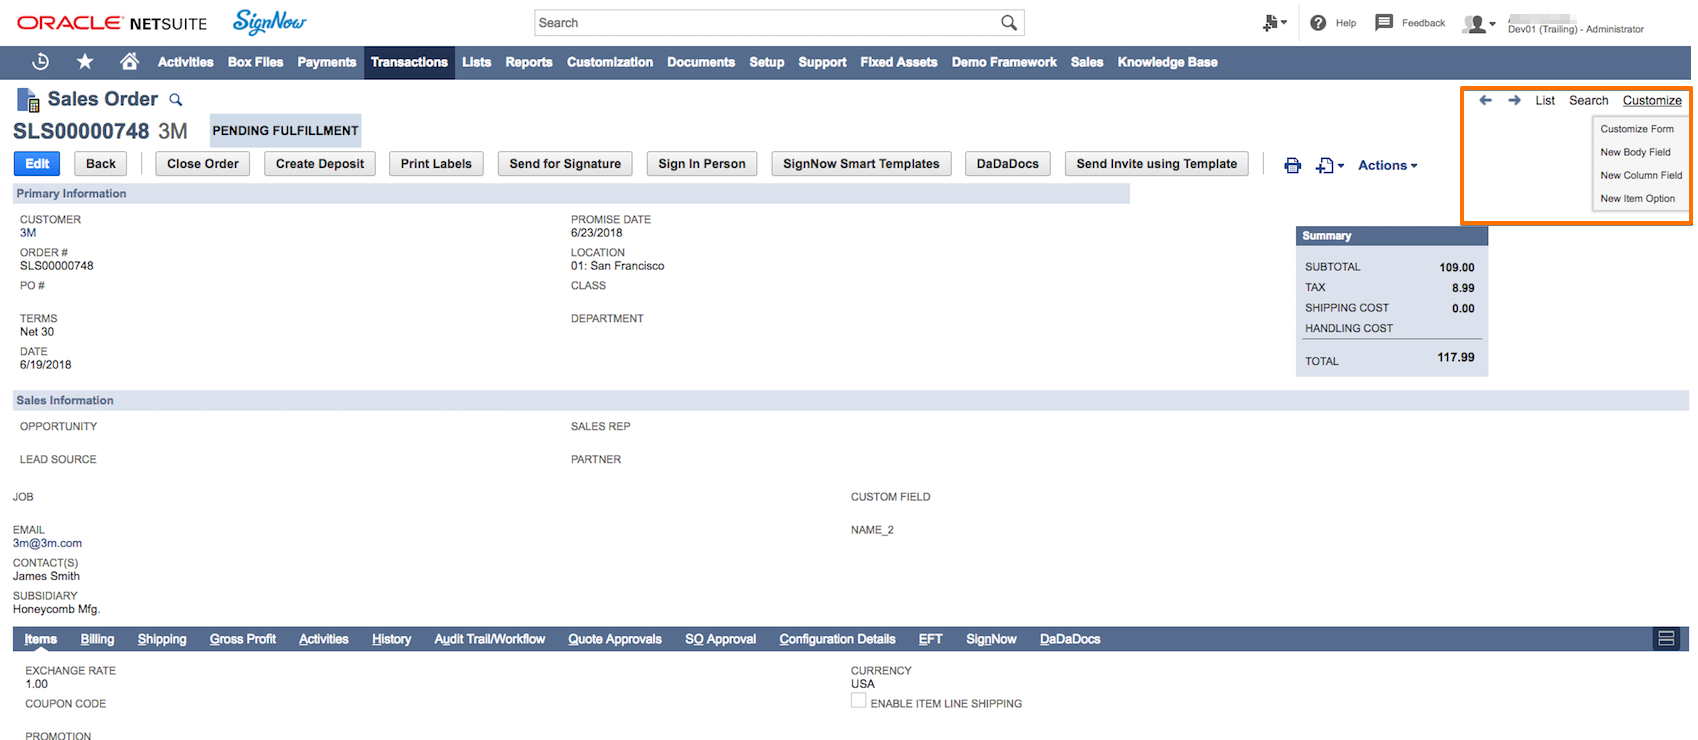
(1) Go to Customize > Customize Form
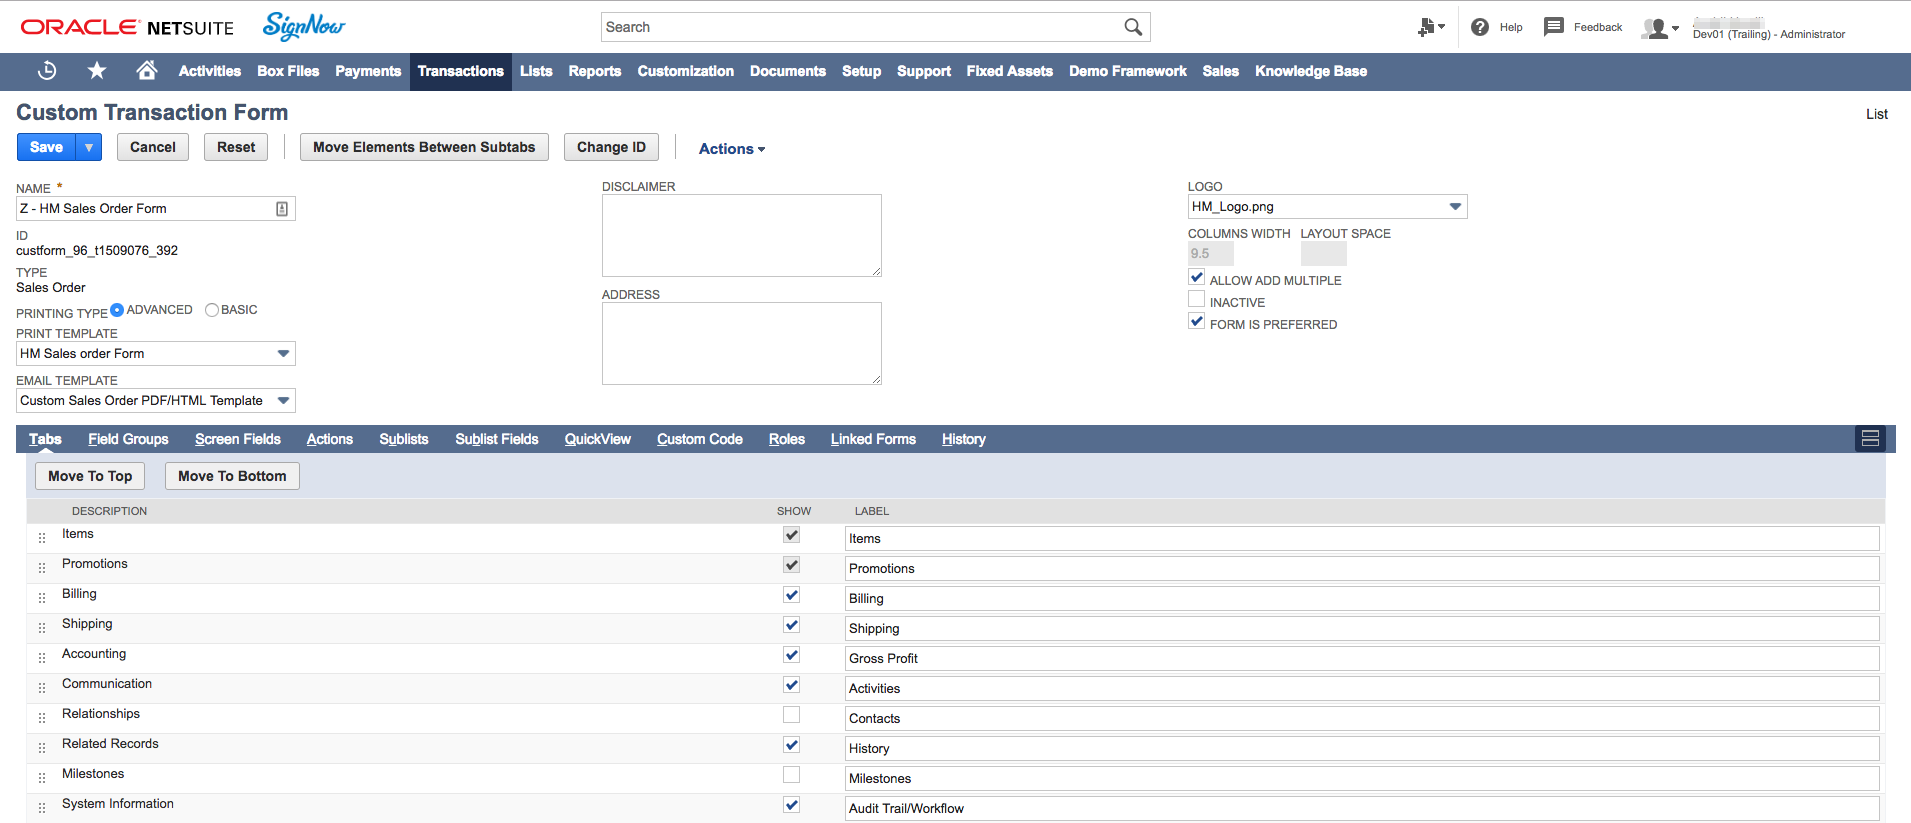
(2) Select the Advanced PDF/HTML template to generate a document from in the Print Template dropdown.
Updated over 5 years ago
