Set up Token-Based Authentication for an Organization
In SignNow for NetSuite administrators generate tokens for authorizing the SignNow bundle in NetSuite. The token authentication is used with features like Send for Signature, Sign In Person or SignNow Smart Templates. The token ID and secret should be generated only once, during the bundle configuration. Save them in a separate document to add them to SignNow Settings.
It is highly recommended to create a NetSuite user for SignNow bundle. This user would authorize the whole organization for using SignNow and administrators wouldn't have to create tokens for each user in their organization.
Note
In case, administrators have to generate and set up a new token pair, SignNow bundle will use only the most recent pair for authorization.
Configuring the token ID and secret consists of two stages: generating an access token; saving the access token in SignNow Settings page.
1. Enable token-based authorization in your organization.
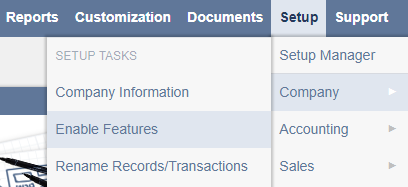
Go to Setup > Company > Enable Features.
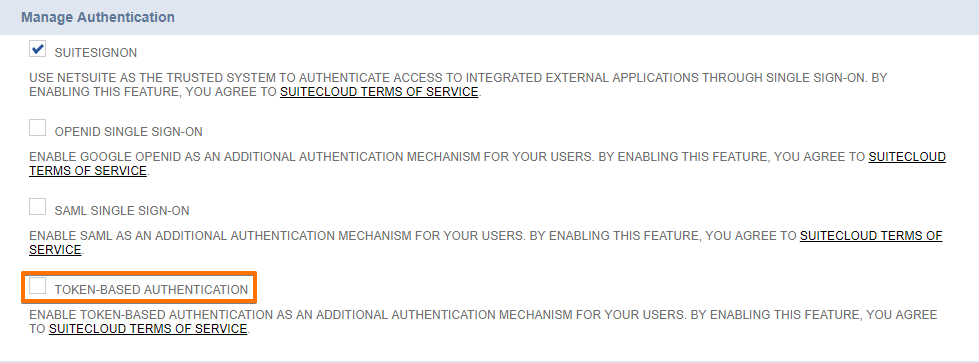
On the Enables Features page go to SuiteCloud subtab and check the Token-Based Authentication checkbox. To enable it, read the consent agreement first.

Create a role with appropriate permissions for using tokens
To add the permissions to any role in NetSuite, go to Setup > Users/Roles > Manage Roles.
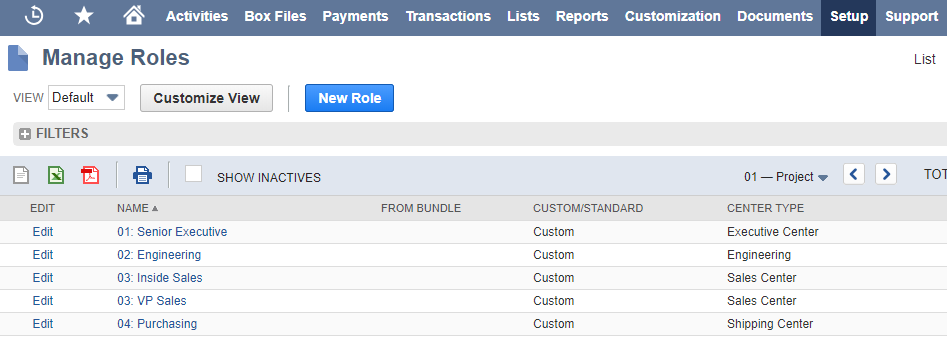
Find the role you'd like to use in SIgnNow and click Edit. Go to Permissions > Setup subtab and add the following: Access Token Management; Log in using Access Tokens; User Access Tokens. Click Add after adding each permission and then - Save.

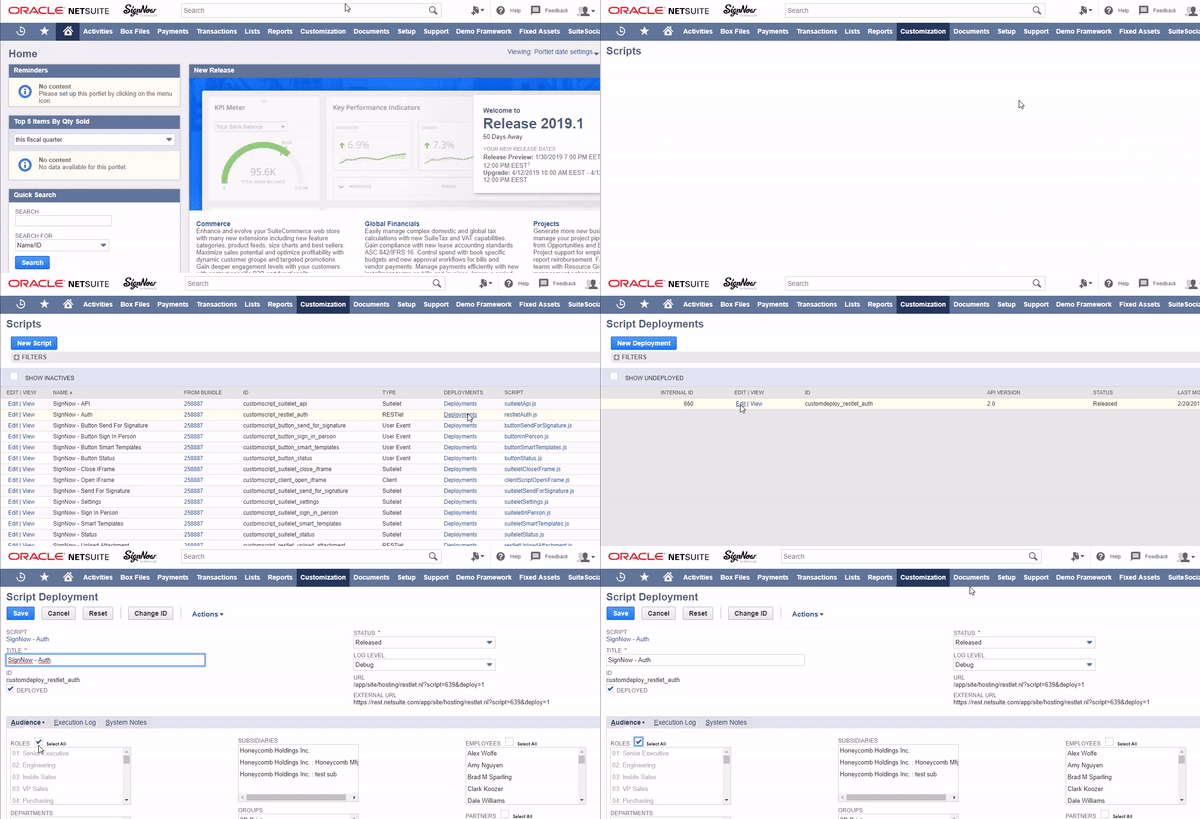
Make sure SignNow_Auth script is selected for all roles
Go to Customization > Scripting > Scripts and find SignNow - Auth. Click Deployments.
In the next page click Edit.
Go to Audience tab and make sure that Select All is checked in the Roles.
2. Generate an access token
Go to Setup > Users/Roles > Access Tokens > New.
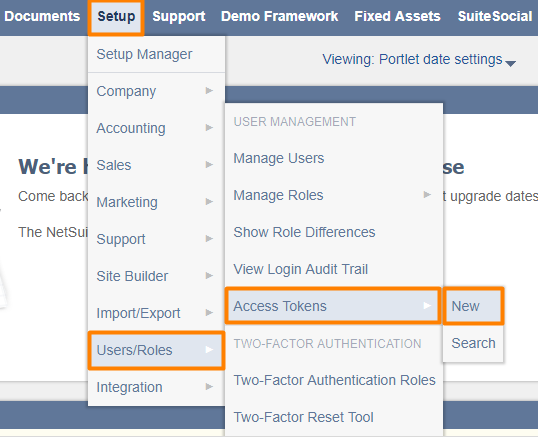
Select:
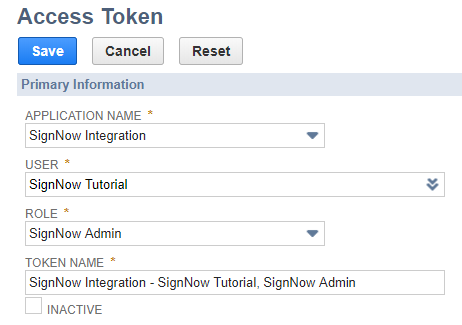
- SignNow Integration in APPLICATION NAME field
- User name in USER field
Note
Add the User you've previously created for SignNow integration.
- In ROLE field select a Role which contains three of the following NetSuite User Permissions: Access Token Management, Log in using Access Tokens, User Access Tokens
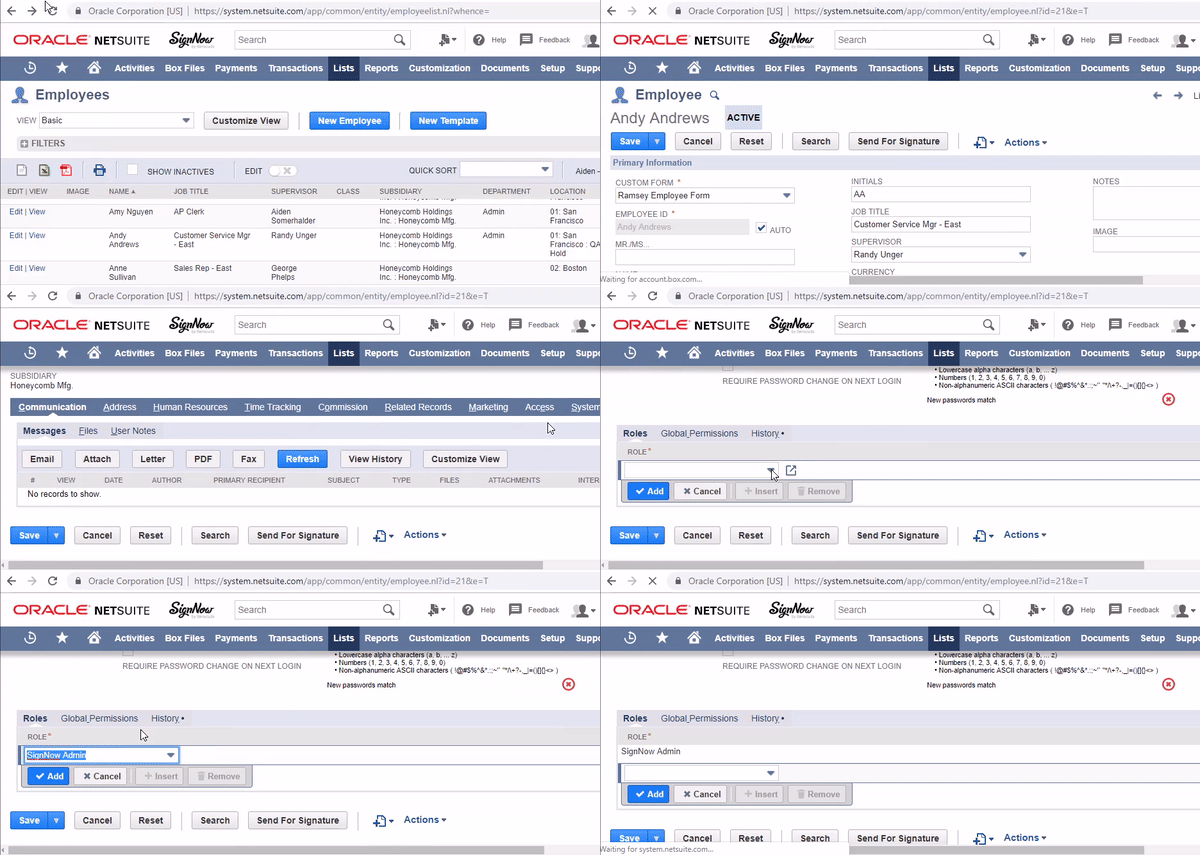
Remember: the user you've created for SignNow integration should carry the Role with above-mentioned permissions. To add the Role to User's profile, find the employee and click Edit. Go to Access subtab > Roles. Add the Role with correct permissions and click Save.
3. Save the Token ID and Secret to a separate file
Once the token is generated, save the Token ID and Secret to a separate file, so you could insert them later in the SignNow Settings page.
Note
You can only access the new generated Token ID and Secret once, right after generating. If you need them to find them, NetSuite doesn’t display its values for security reasons, so you will have to generate a new token again.
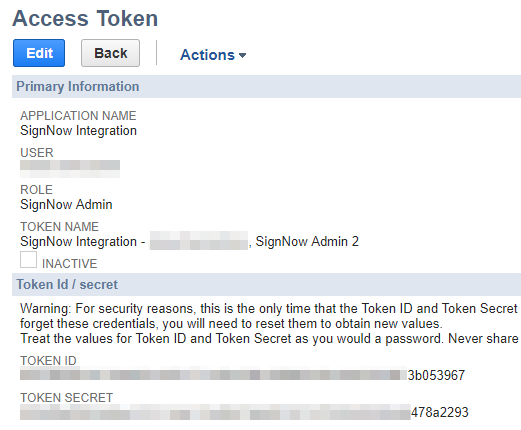
Copy the Token ID and Token Secret and save in a separate file
4. Add the generated token pair to SignNow Settings
When you have the token pair, it should be added to SignNow Settings.
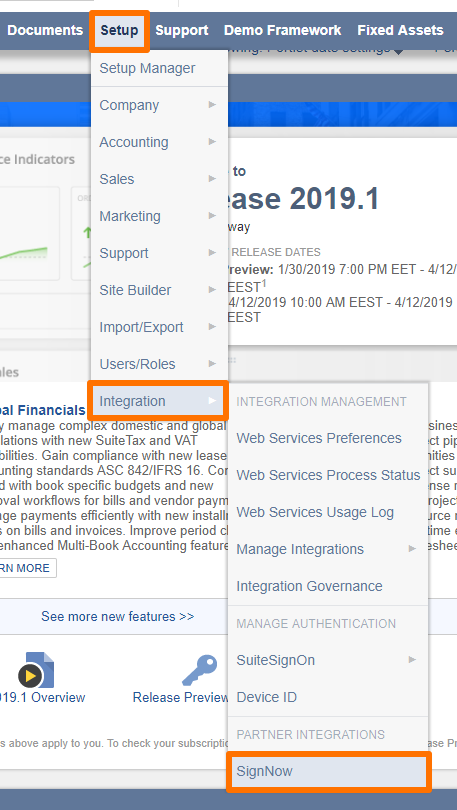
Go to Setup > Integration > SignNow.
In SignNow Settings page go to the NetSuite Access Token tab and insert the Token ID and Secret in the corresponding fields.
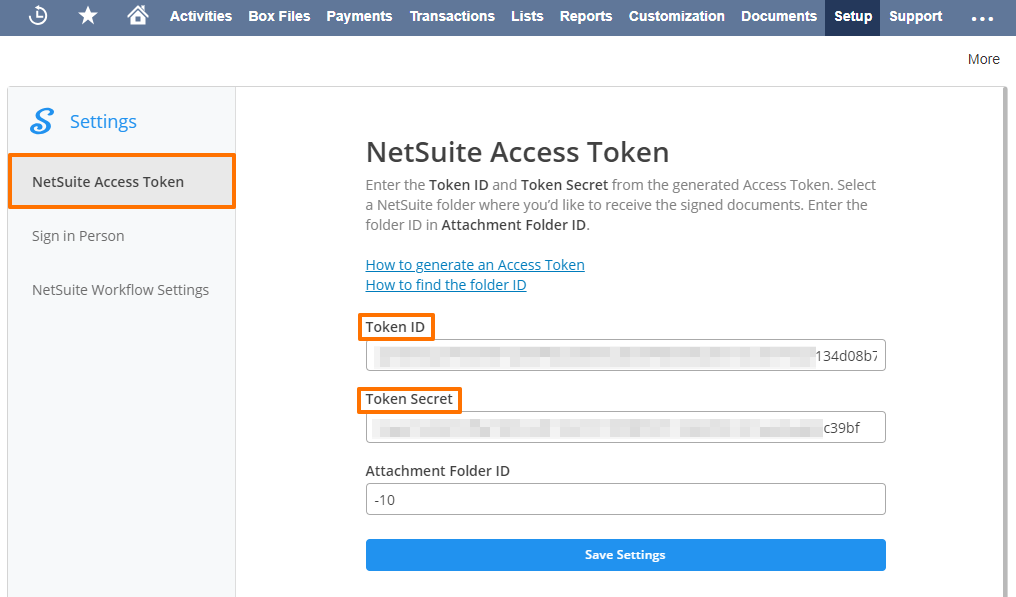
Click Save Settings.
Updated over 6 years ago
