Set up the Workflow - Send for Signature
Workflow - Send for Signature is inactive by default
To activate the workflow, go to Customization > Scripting > Scripts, find the Workflow - Send for Signature script and click Edit. In the script remove the checkmark from the Inactive checkbox.
When you create a sales order, you don’t have to manually prepare a sales order in PDF for your contact to approve the list of items ordered. In SignNow you can generate it automatically.
To start using this feature, make sure you have the correct credentials saved in SignNow Settings.
Note
All the sales orders signed during the Workflow - Send for Signature are emailed to the specified account as attachments in PDF file format.
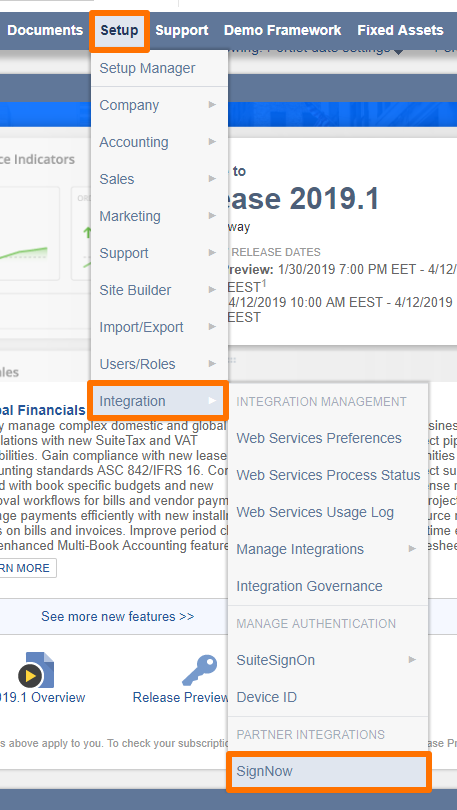
- Go to Setup - Integration - SignNow.

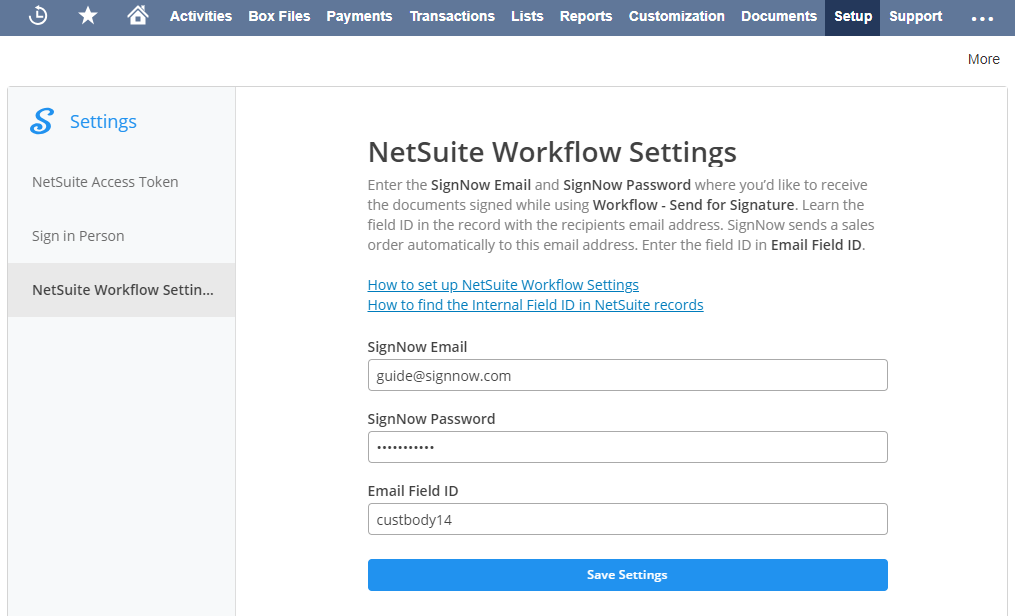
- In SignNow Settings go to the NetSuite Workflow Settings tab. Insert the email and password to the account where you'd like to receive the signed sales orders from the Workflow - Send for Signature.
The email address goes to the SignNow Email field, and password - to the SignNow Password field.
SignNow uses these credentials for the sole purpose of securely storing documents. They will never be shared with any third or outside parties.
Click Save Settings when you're done.

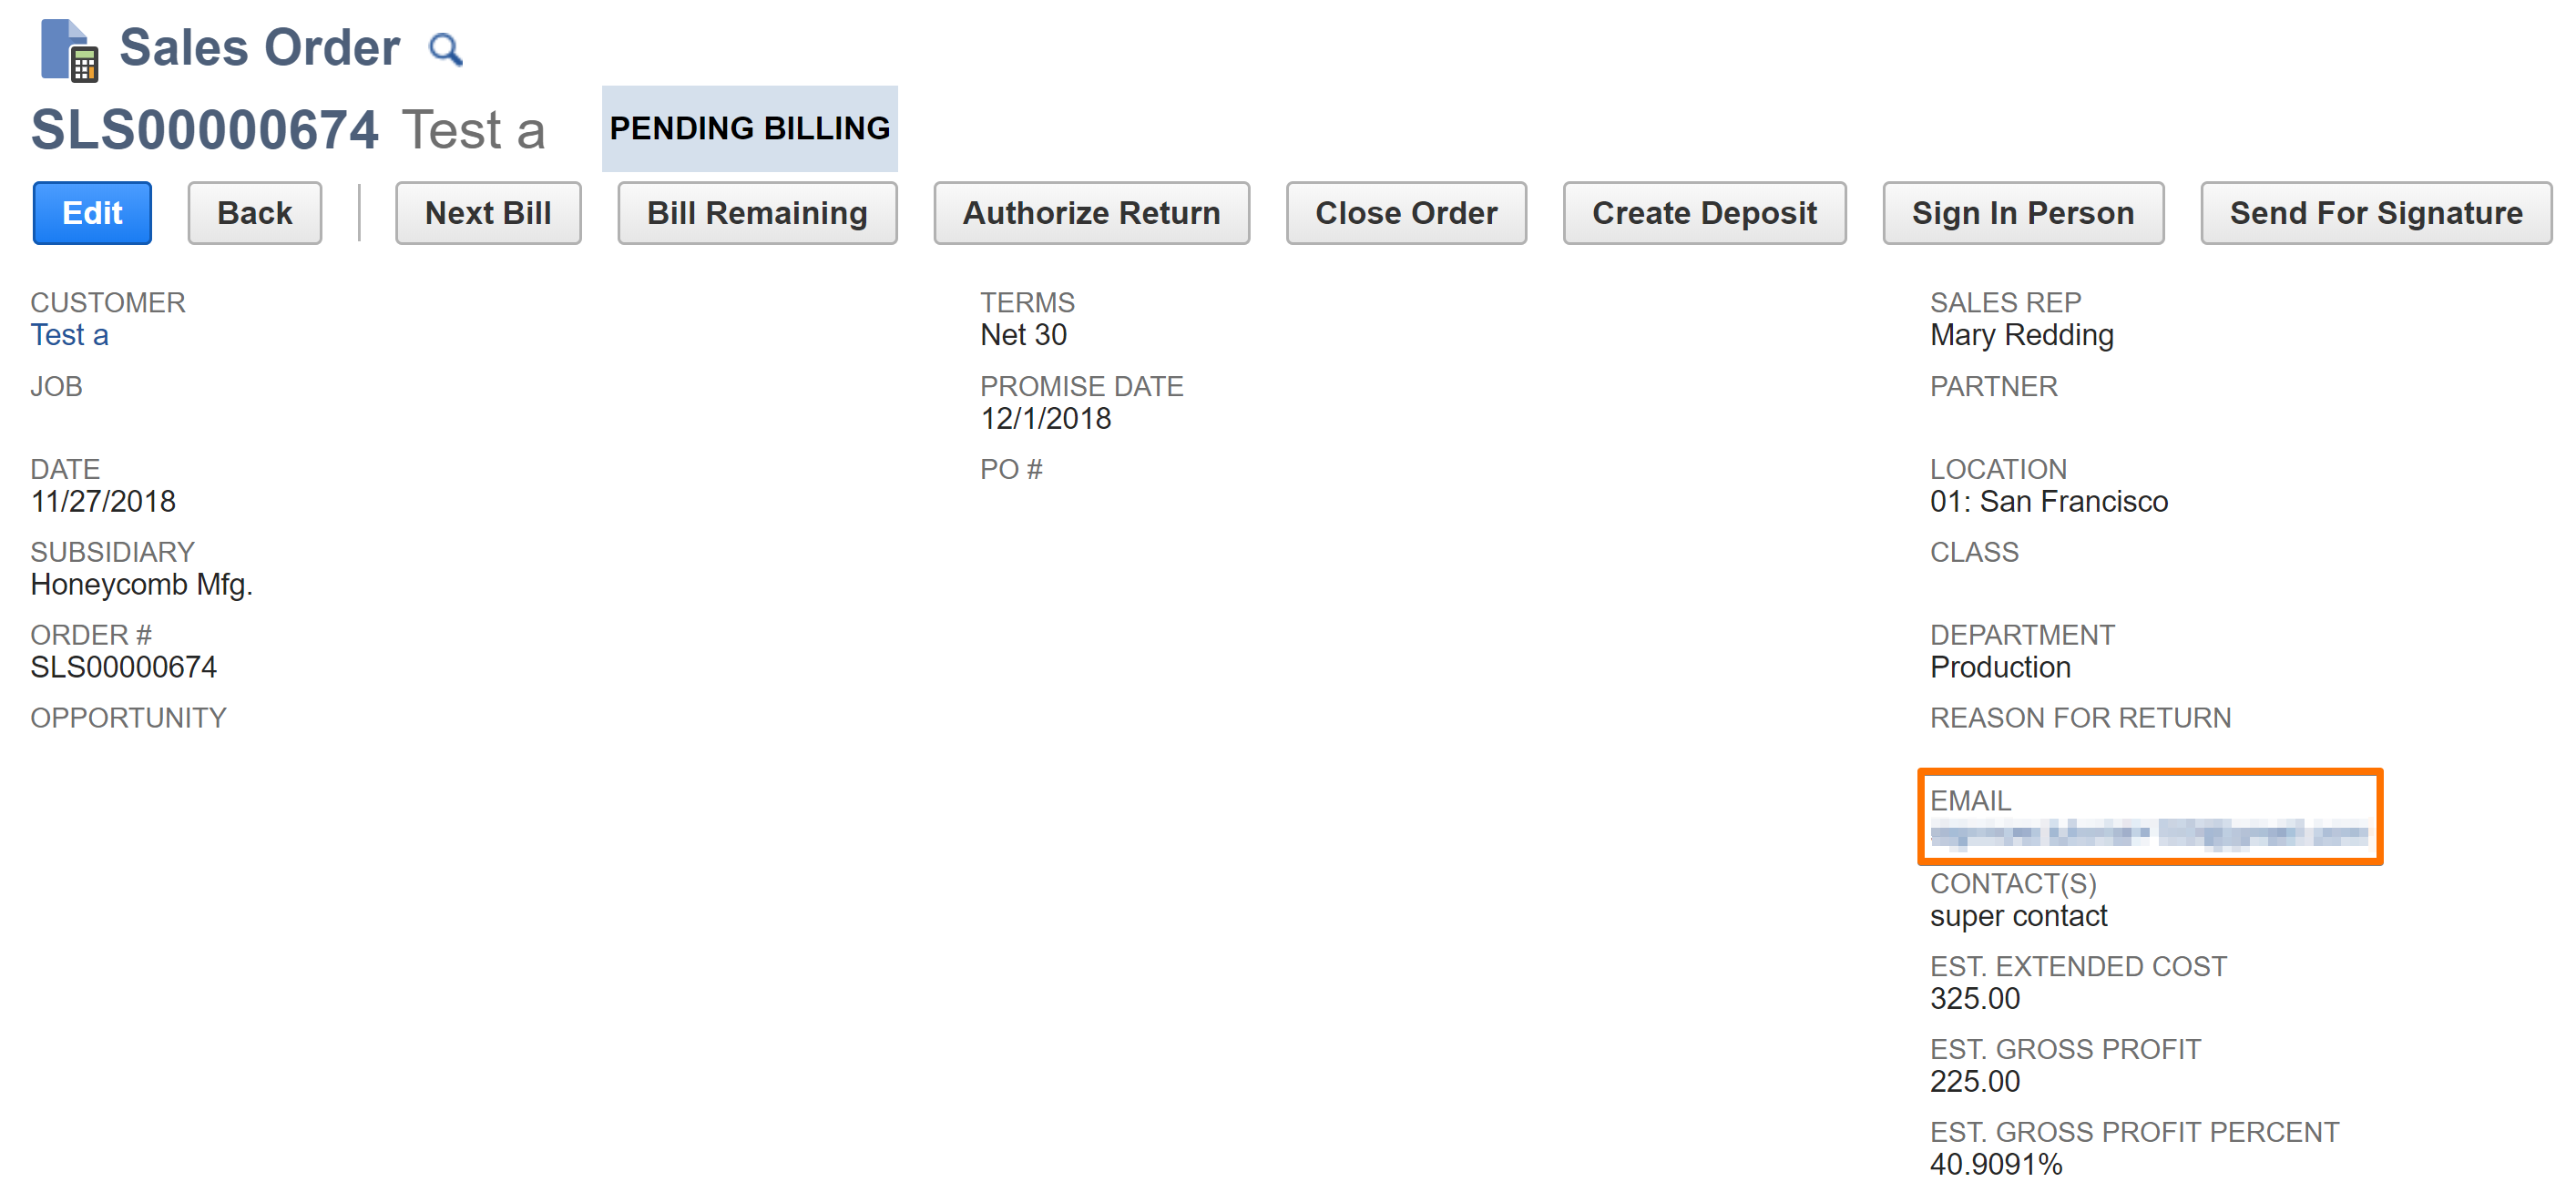
Note the Email Field ID. Here you specify a field in the NetSuite record to get the recipient email from. For example, in the Sales order the email of the customer is stored in the field labeled “custbody 14”.

To learn the Field ID, click on the name of the field or check this article on how to enable Field IDs for showing in your account.

Copy the field ID and go back to SignNow Settings: Setup > Integration > SignNow.
Go to NetSuite Workflow Settings and insert the field ID in the Email Field ID. Click Save Settings when you're done.

All set. Now let’s see how it works.
Updated over 5 years ago
