Sign In Person
Sign In Person allows users to collect signatures at worksites in-person. Parties agree to sign a document on one device, for example, to draw a signature on a tablet with a finger. When guest signers get your device, they can’t access any files or records in NetSuite, only the document with the signature request.
Configure Sign In Person
To set up Sign In Person for your NetSuite account, follow the instructions from this article.
- Open the NetSuite record and click Sign In Person.
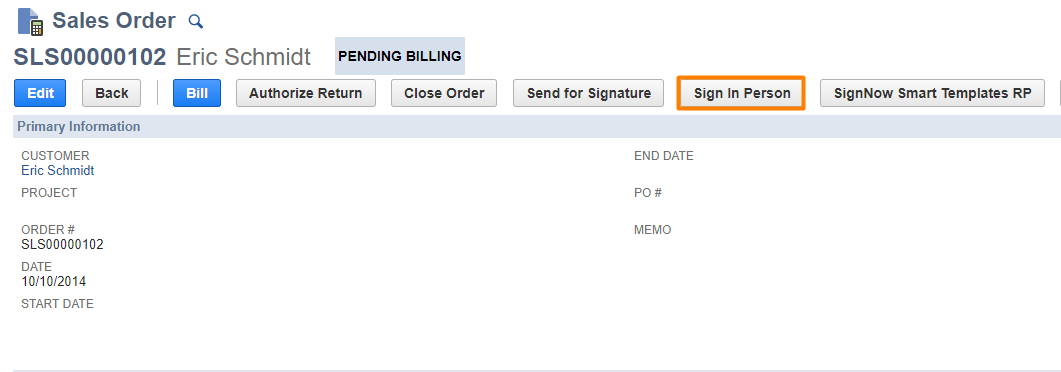
Sign In Person button in a sales order
- Enter the signer's details in the new window.
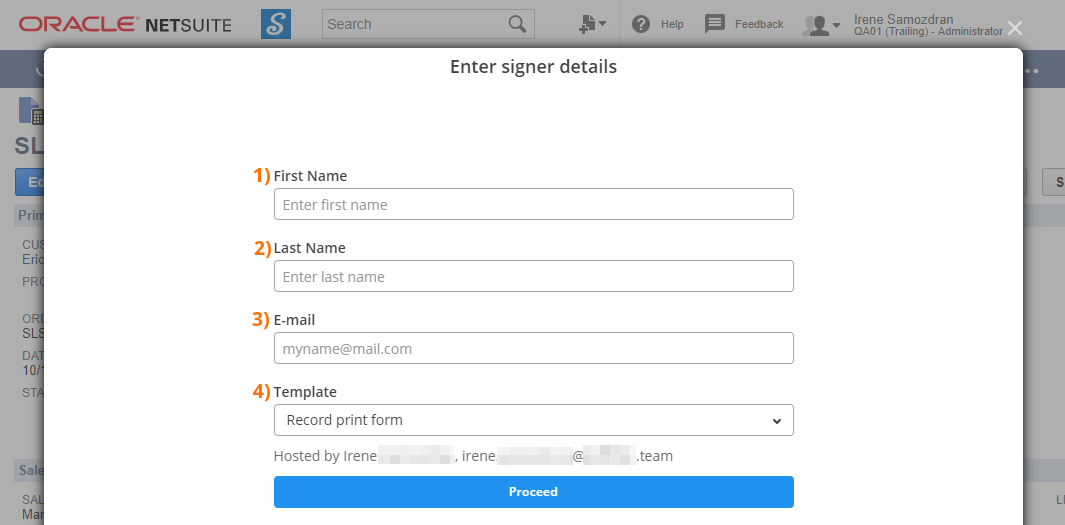
- Enter signer's First name
- Provide signer's Last name
- Type in the signer's email address
- Select a Template for the generated document
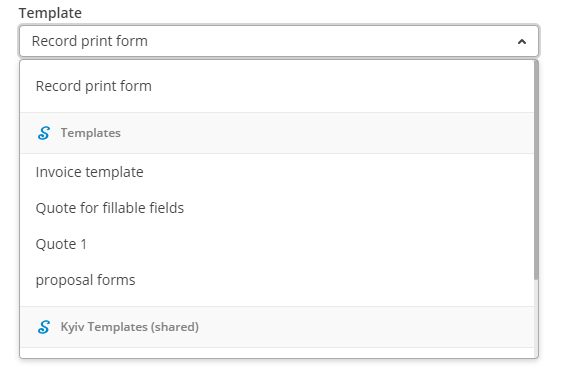
Here you have three options:
- Option 1: select Record print form
This will generate a document according to the Advanced PDF/HTML Template that’s been preset as a print form for the record.
Record Print Form
A Record print form stands for a NetSuite Advanced PDF/HTML Template. There are standard templates in any NetSuite organization. You can use a standard template or build a custom template and preset it as your Record print form.
To find this form and customize its layout, or add more fillable fields to it, for example, for multiple signers, go to Customize - Customize Form on the upper right corner in your record.
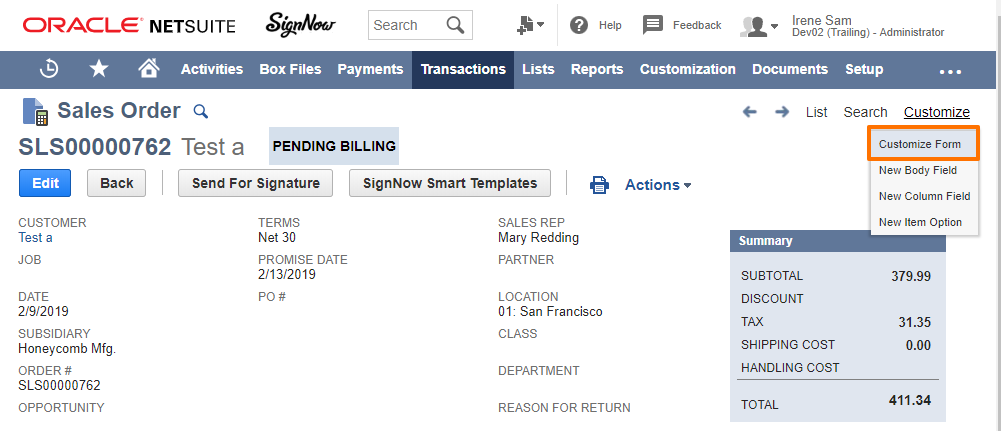
Select the template in the Print Template dropdown menu.
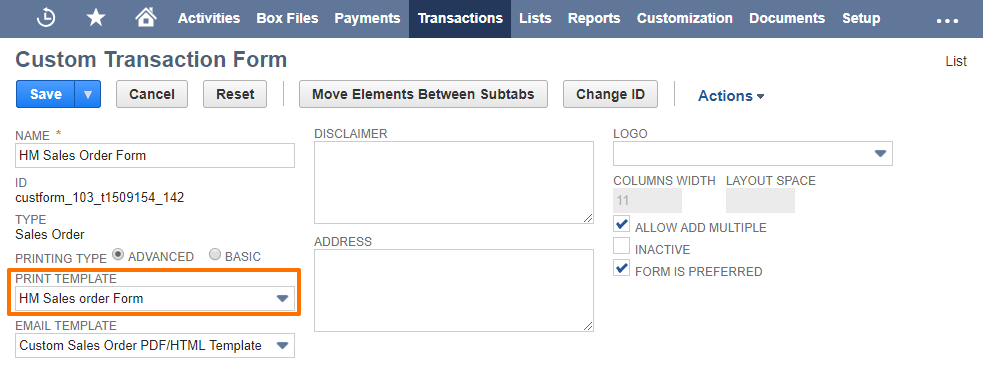
If you'd like to edit the Print Template, find the template at Customization > Forms > Advanced PDF/HTML Templates. If you'd like to add fillable fields to it, i.e. a Signature field, it's best to use Text tags.
How to add fillable fields to Advanced PDF/HTML template using Text tags
Open the template in HTML mode. Use this article to copy the Text tags and insert them into the template. There's a full list of Text tags and which fillable fields they stand for.
- Option 2: select any of the SignNow templates
You’ll be able to choose among the templates created and shared in SignNow.
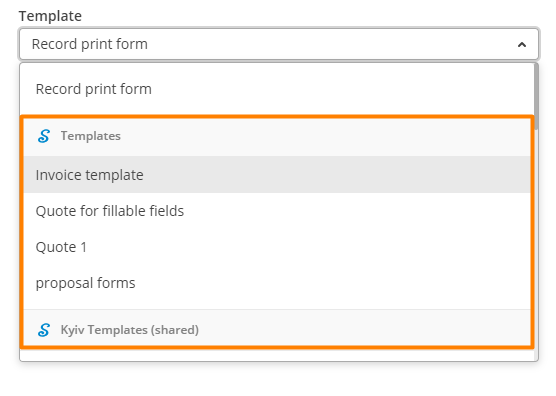
As an admin, you can share templates from your SignNow account with employees in your organization. The shared templates will be available only for document generation. Editing templates, removing them or managing access to them remains in control of the SignNow account holder.
How to share SignNow Templates
You can do it in SignNow by creating a team, adding employees’s email addresses to it, and then sharing templates with a team.
To create a team in SignNow:
- Click on Create Team in the bottom left corner of the page.
- Type the name of the team and add the email addresses of the people you want to invite to the team in the window that appears next. Click Add Team.
- Once a team has been created, click Back to My Documents.
To share a template with a team in SignNow:
- Proceed to the Templates folder. Click on the More button next to the template you need to move and select Move.
- Select your team’s folder and click Move Here.
- Click on your folder in the Shared Templates section and confirm that the shared template has already appeared in this folder and can be viewed by all team members.
- Option 3: select any of the Advanced PDF/HTML templates
The list of available templates is comprised by the NetSuite administrator.
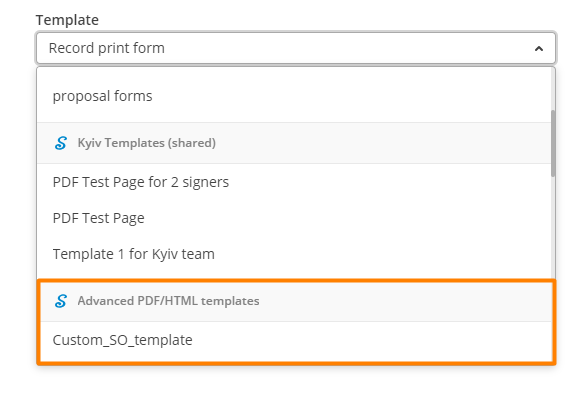
How to enable Advanced PDF/HTML templates for Sign In Person
Administrators or employees with eqiuvalent level of access rights comprise a separate list of Advanced templates in a specific record type. This record type is installed with the SignNow bundle. Learn how to make a list of Advanced PDF/HTML templates from these step-by-step guidelines.
Click Proceed when you're done.
Next step: the letter of consent opens.
- Signers should read a letter of consent carefully, then click either I consent to do business electronically, or I do not consent. If they don’t accept the letter of consent, the window simply closes.
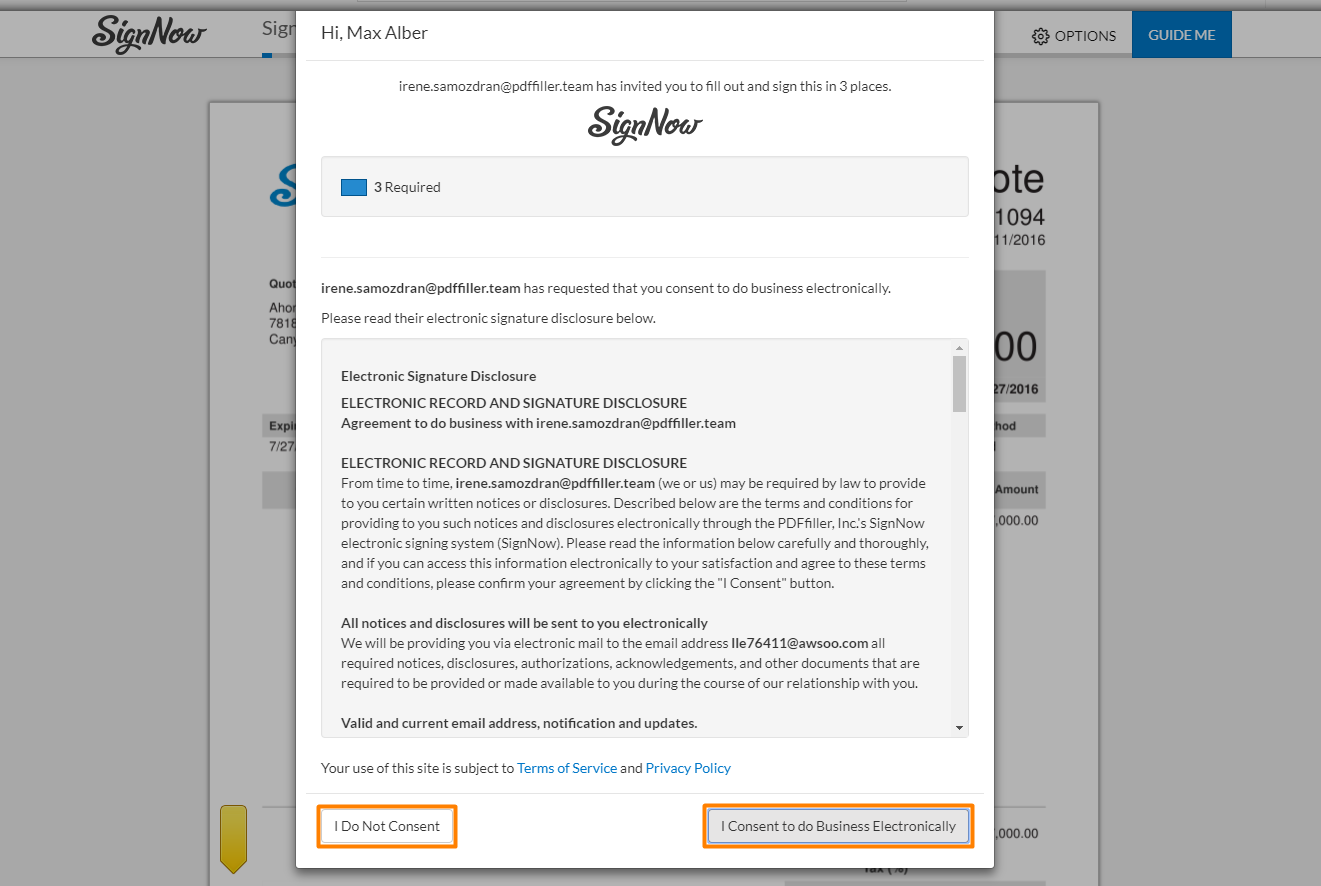
Sign In Person Letter of Consent
If they agree to proceed, the generated PDF opens for signature.
- Click Guide me, if you’d like to find all fillable fields faster.
In Options:
- Document History: review all changes in the document
- Languages: select one of 24 languages from the dropdown
- Download: click to download this PDF to your device
- Decline to Sign: click and type in a reason for declining.

Options for a document in Sign In Person mode
- Type, sign, and click Done.
Once the document has been signed, you’ll receive a notification email. The signed PDF will return to your SignNow account and to the NetSuite record it was sent from - you’ll be able to find it under the Files subtab.
Updated over 6 years ago
