Prefill a document (using SignNow Smart Templates)
- Click SignNow Smart Templates on your NetSuite record page:
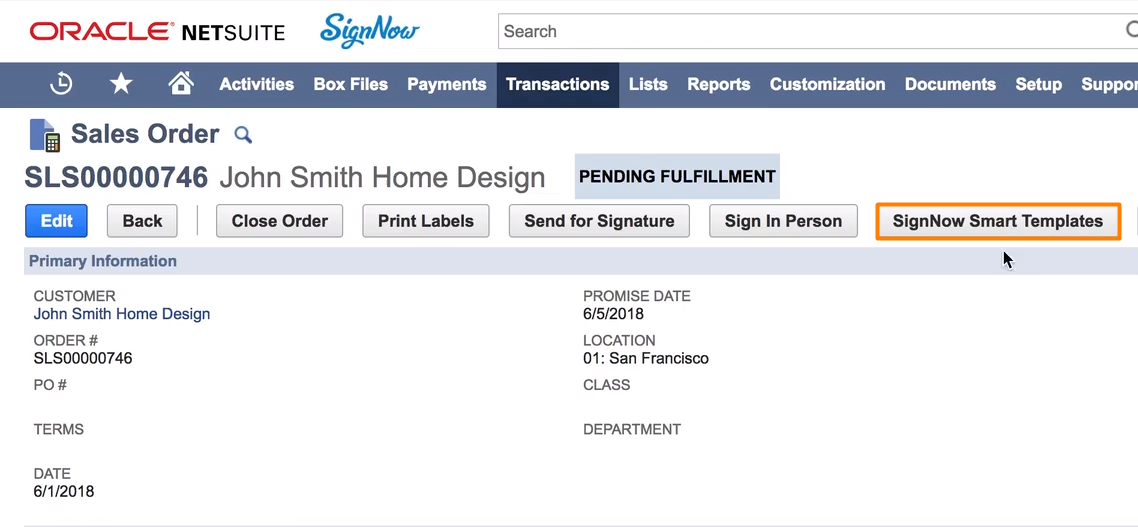
SignNow Smart Templates
On the Templates page that opens next, choose the document you need and click Generate:
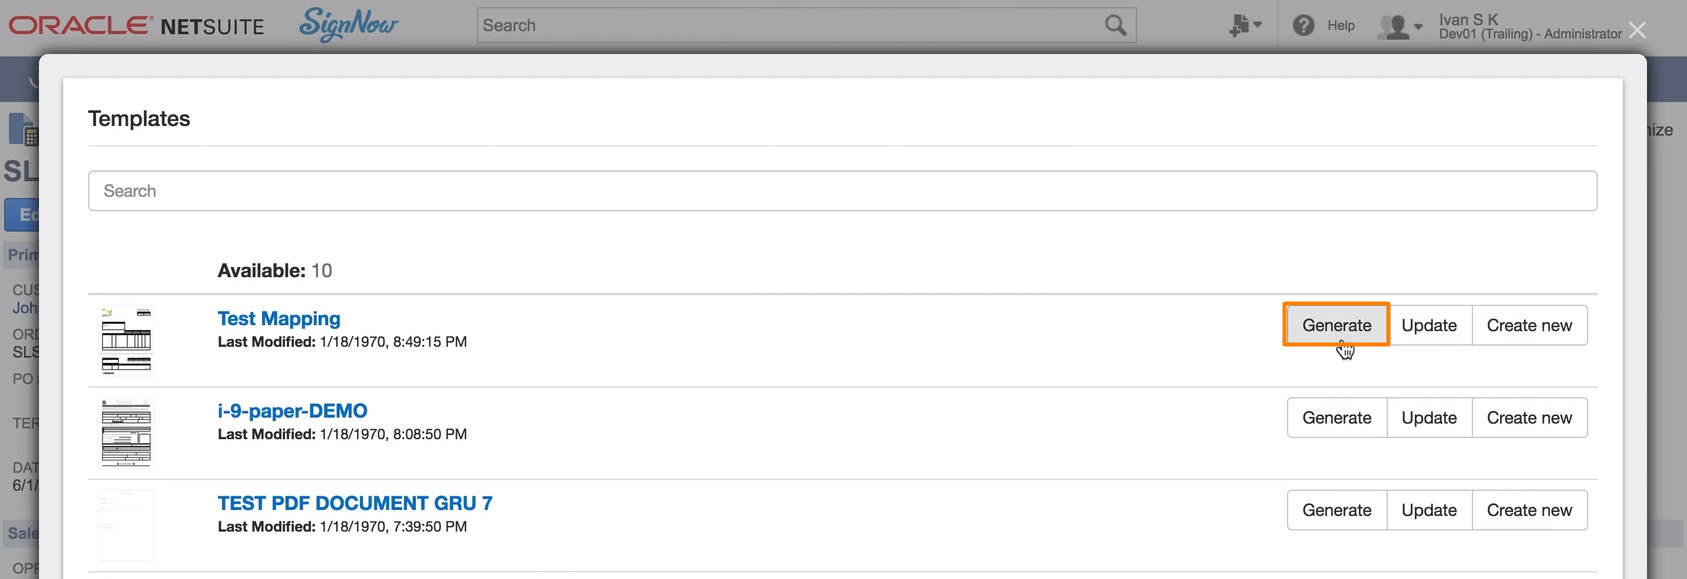
The SignNow editor window opens. Follow the instructions for creating a template from SignNow Smart Templates.
- Give unique names to fillable fields that correspond with Field IDs from the NetSuite record.

Step 1. Add a fillable text field

Step 2. Copy the Field ID
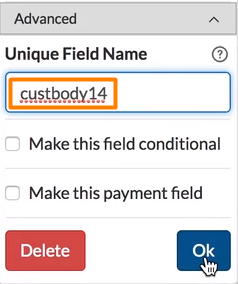
Step 3. Paste the Field ID in Unique Field Name under Advanced and click Ok
Repeat these steps with as many fields as you want, then hit Done in the upper right.
- Go back to your record, click SignNow Smart Templates and Generate again. In Advanced Bindings, change the document name if needed. Add the recipient’s email address in Signer 1.
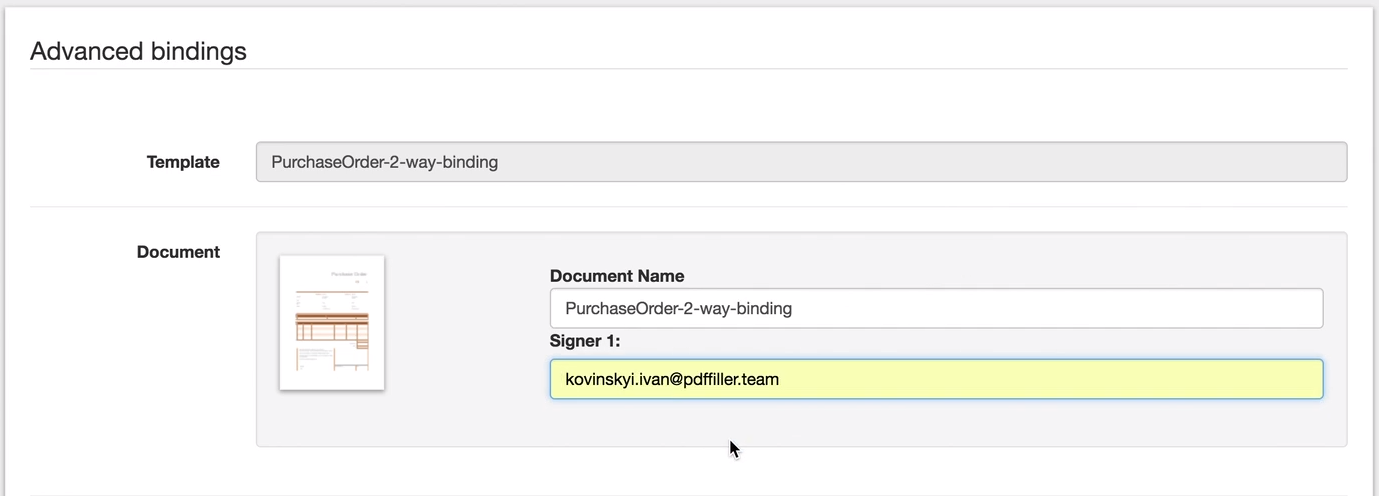
- Now, review Mapping. This is where you can confirm if the data from the NetSuite fields was transferred correctly and edit the NetSuite Value, if necessary.
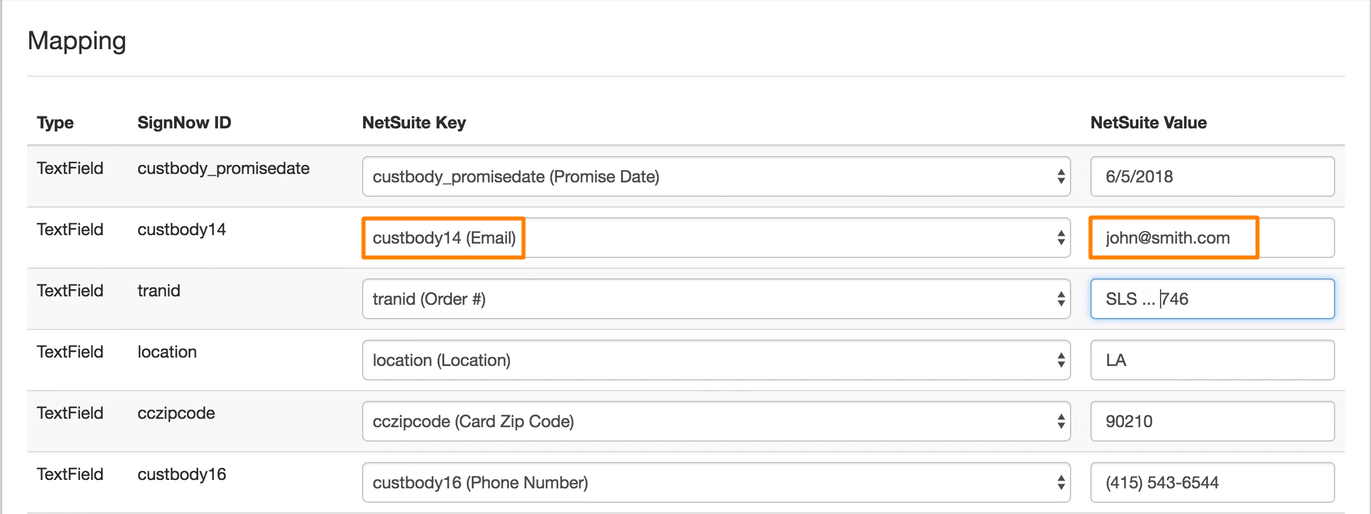
You may hide the fillable fields or make them visible - it’s your call. Check the box under Mapping if you’re inclined to hide the fillable fields. Keep it empty if the fields should be visible.
When all edits have been applied, click Generate under the Mapping section.
Your recipient should receive an email with a link to open the generated prefilled document.

By clicking Open Document, the recipient will see the generated prefilled PDF in the SignNow editor.
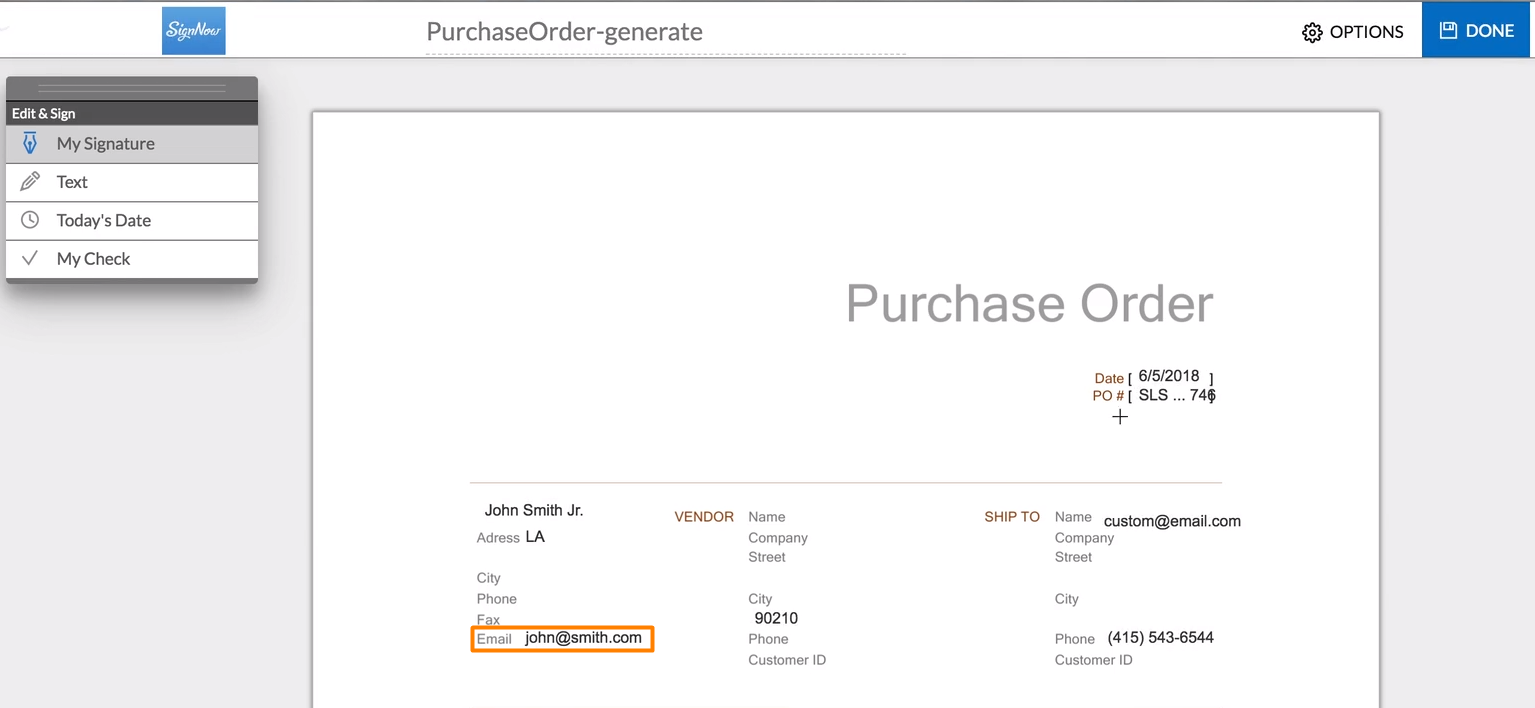
Recipients can sign the document without having to register with SignNow. Once the document has been signed, you’ll receive a signed copy in your SignNow account.
Updated over 6 years ago
