Deploy SignNow buttons to specific record types and user groups
To create SignNow buttons and authorize users and groups with specific NetSuite roles to use SignNow, use the scripts installed with a SignNow bundle.
SignNow button scripts
The following scripts should be available:
-
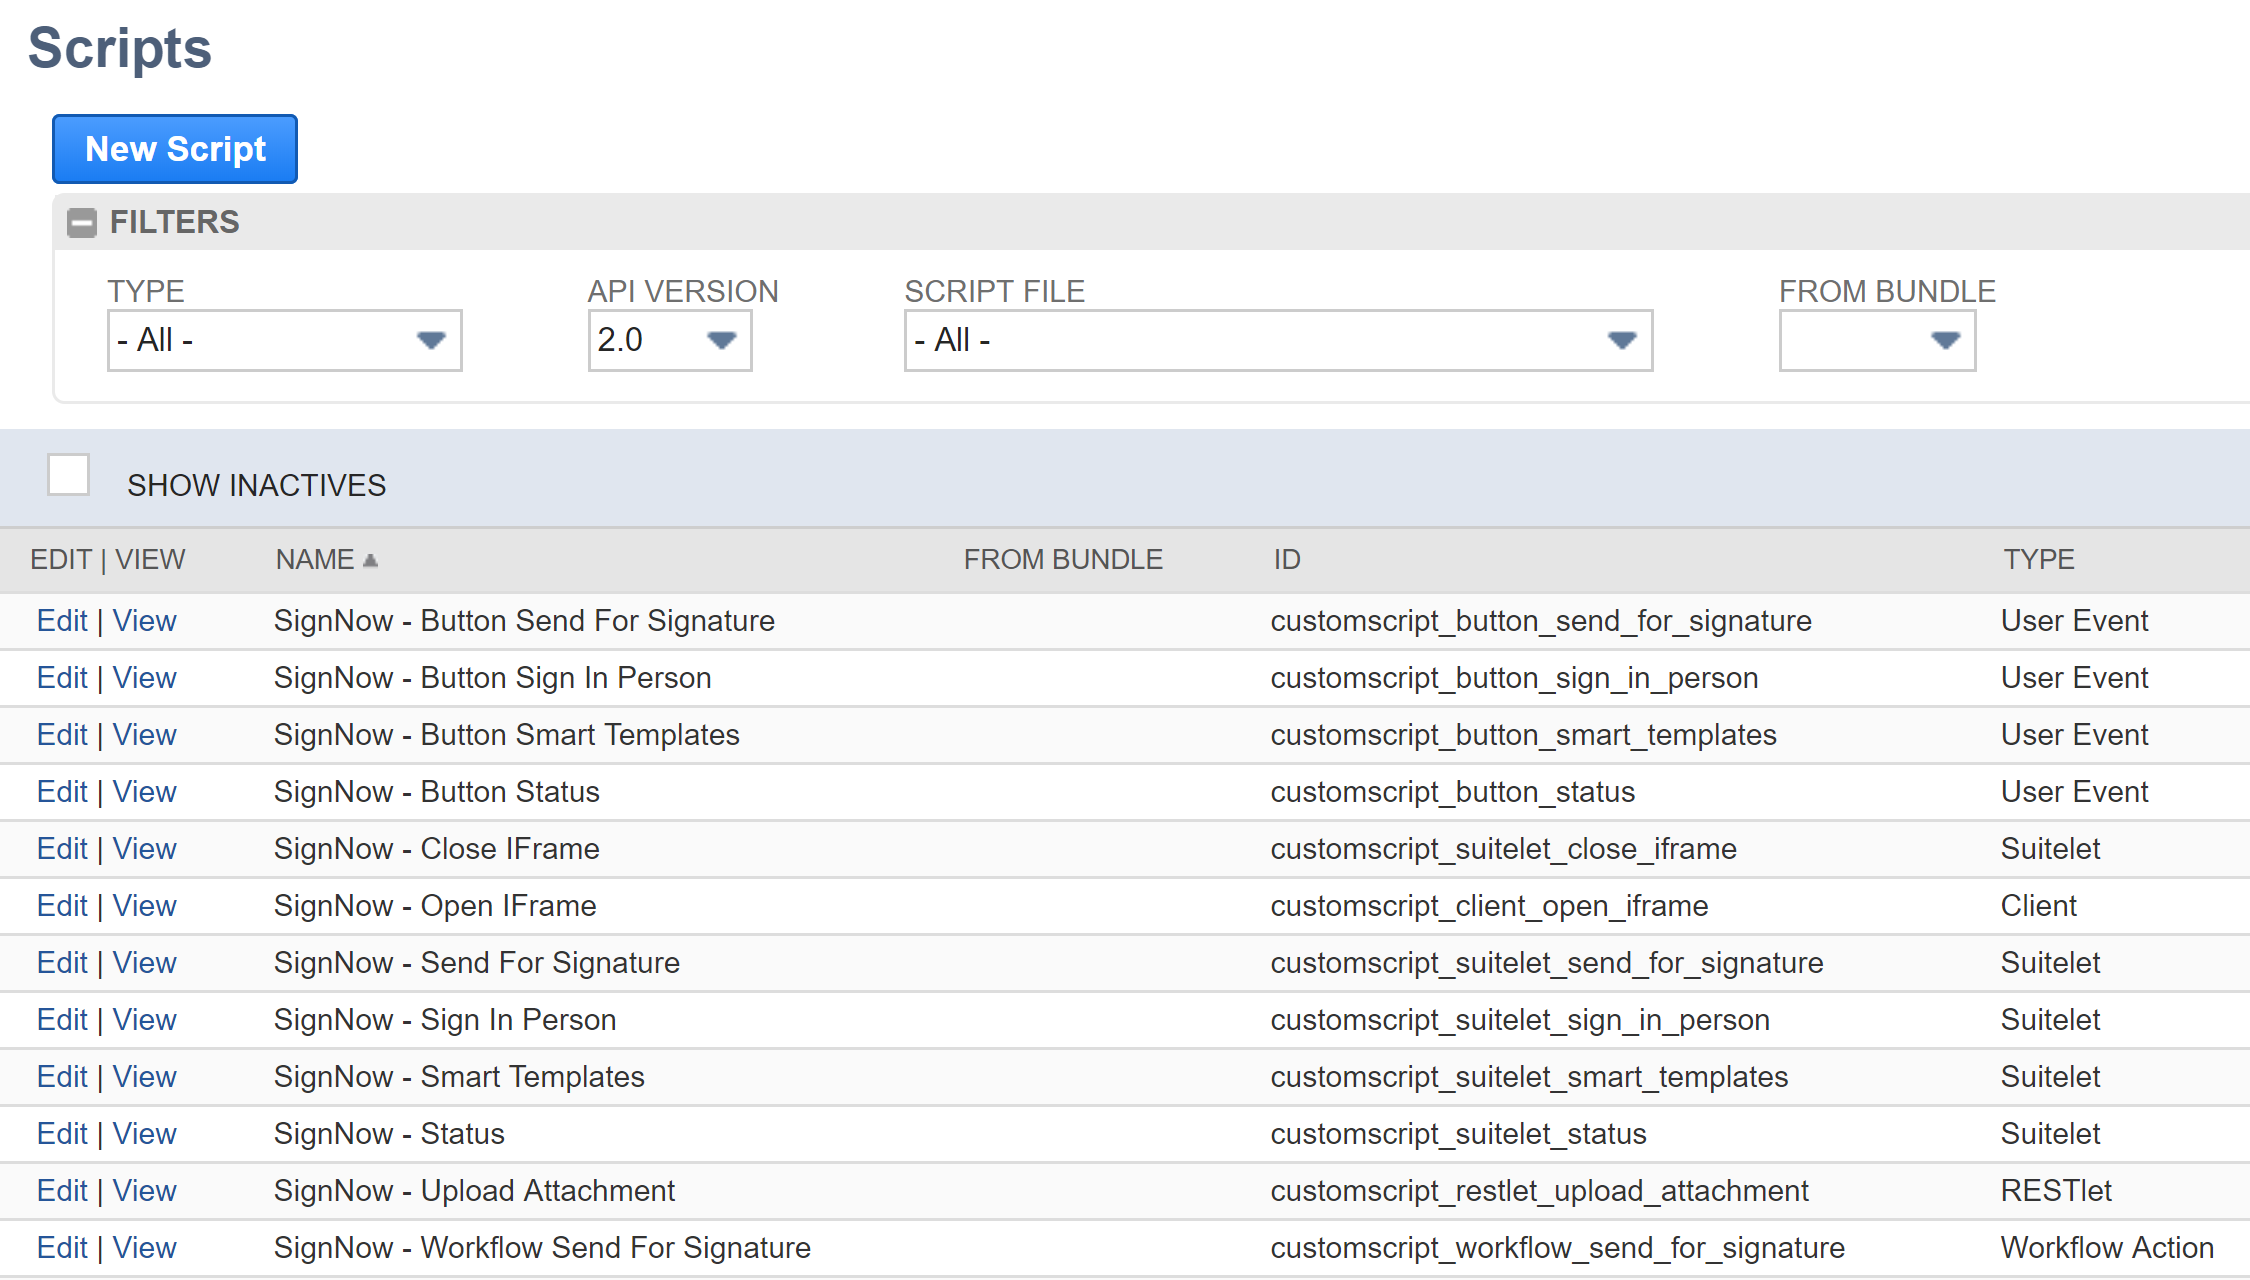
Signnow - Button Status - creates a Signnow Tab that shows any documents sent for signature for the specific record. Deploy this to any record type where you would like to display a SignNow Tab. Connected to executing the script SignNow - Status.
-
Signnow - Button Send For Signature - deploy this to any record type which users can later turn into a PDF and send out for signature. Appears as Send for Signature button. Connected to executing the script SignNow - Send For Signature.
-
Signnow - Button Template - creates a button connected to one of SignNow templates. Deploy it to all the record types where users might use a shortcut to generating a standard quote or invoice, etc. Appears as a button with a template name.
-
Signnow - Button Sign In Person - creates a button to start Sign In Person workflow - get a document ready for signing, open it on one device and pass it over, so the signer could eSign it. Appears as Sign In Person button. Connected to executing the script SignNow - Sign In Person.
-
Signnow - Button Smart Templates - provides access to SignNow Smart Templates. Using SignNow Smart Templates creates documents that collect customer data. Not only they return as PDF attachments, they also carry data which automatically updates or creates NetSuite records. Appears as SignNow Smart Templates button. Connected to executing the script SignNow - Smart Templates.
Check if all SignNow button scripts have been installed with the bundle
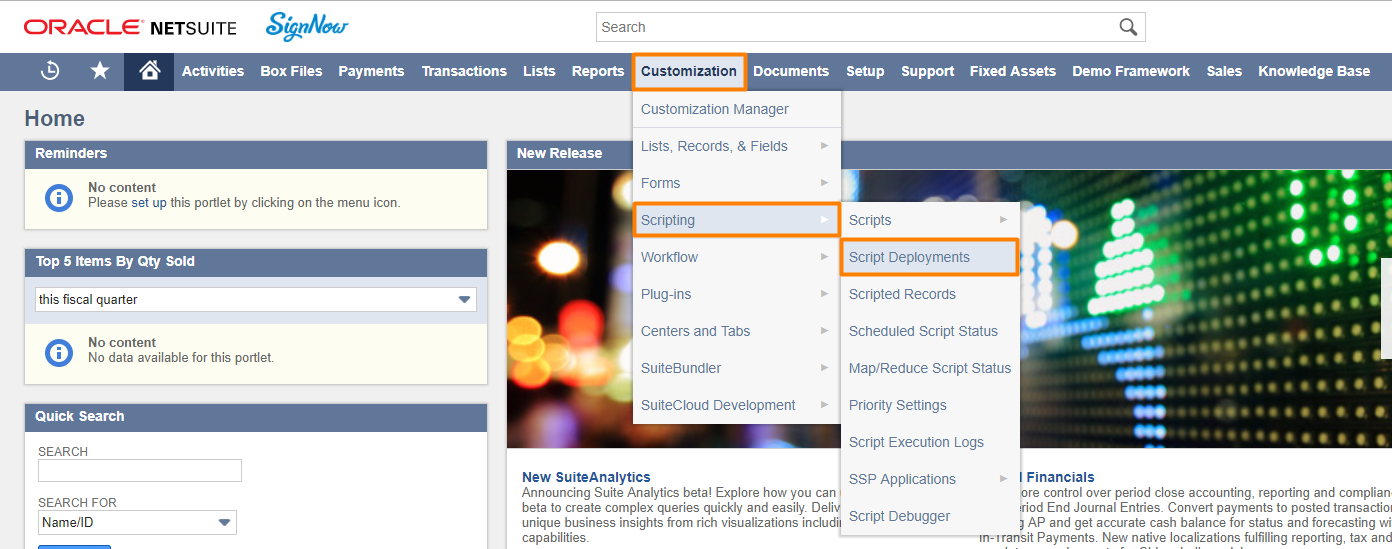
- Go to Customization > Scripting > Script Deployments.
- Spot the scripts on the list.
Edit button script settings in NetSuite
If you want to make SignNow buttons visible only in specific NetSuite entities, edit the script settings for each button.
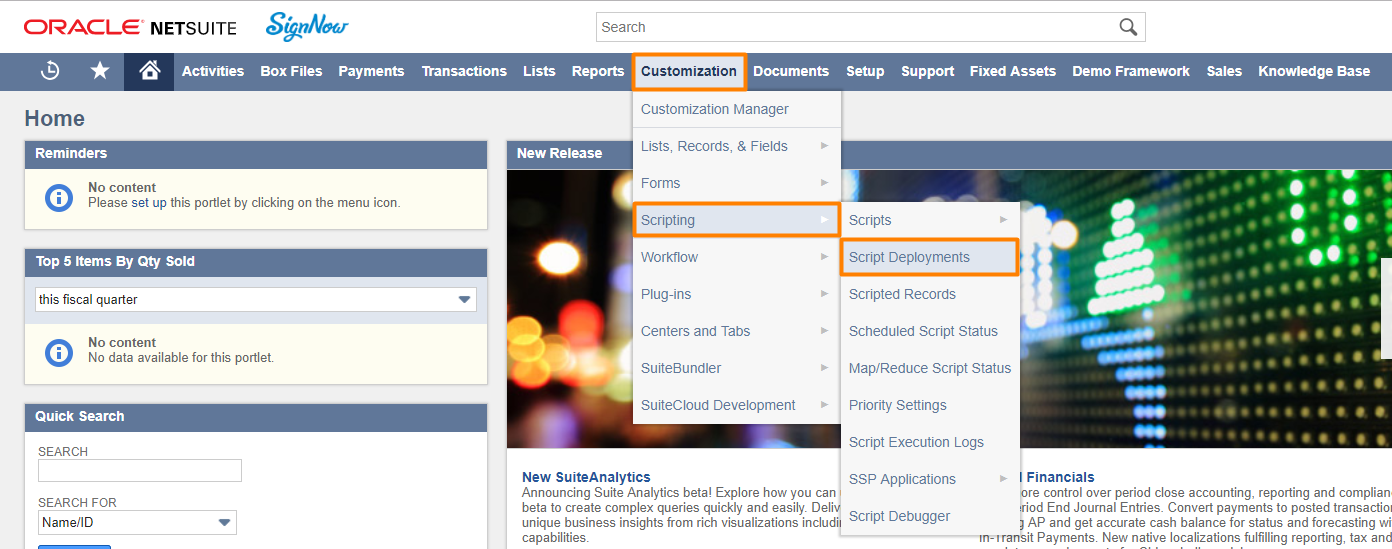
- Go to Customization > Scripting > Script Deployments.
- Click Edit for the designated button.

Script Deployment page opens. Here several entities are available for quick edits:
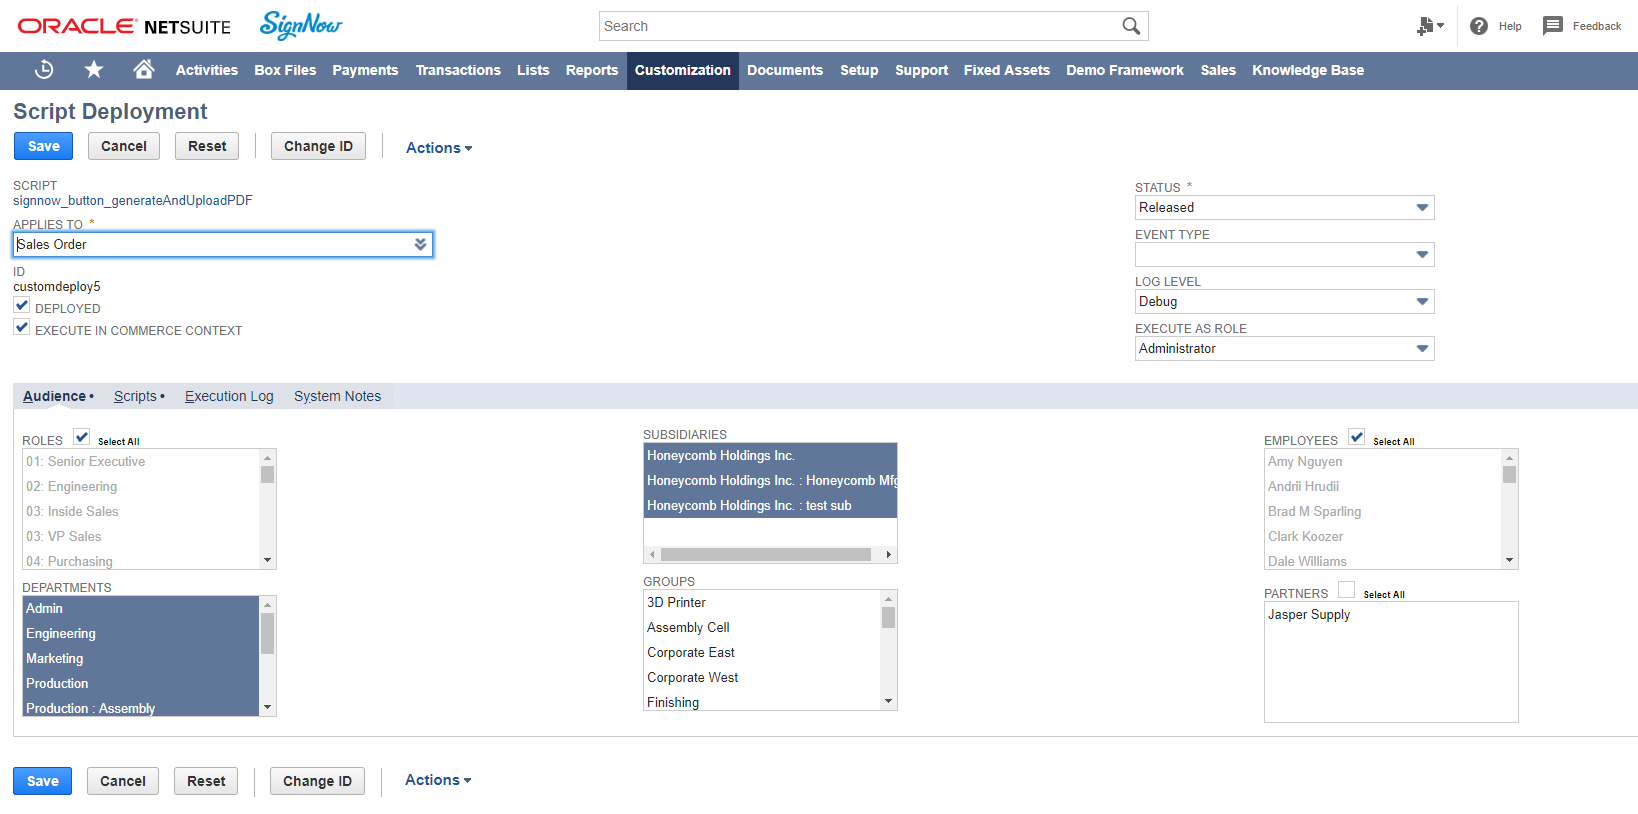
- Change ID: click to change the button ID.
- APPLIES TO: in this section check the object(s) where the button has been deployed to. The list is available if you hover over it.
- DEPLOYED: to hide the button, uncheck this box.
- EXECUTE IN COMMERCE CONTEXT: to remove the button from commerce context, uncheck this box.
- STATUS: change the status of a button to Released or Testing in this dropdown.
- EVENT TYPE: Select an event type from this dropdown, such as Approve or Reassign. It will make the SignNow button visible when user creates a certain type of event.
- LOG LEVEL: Select the button’s log level, such as Debug, Audit, Error, or Emergency, in this dropdown.
- EXECUTE AS ROLE: select a role for button execution in this dropdown.

Under Audience subtab, check the ROLES, DEPARTMENTS, SUBSIDIARIES, GROUPS, EMPLOYEES, and PARTNERS who can use SignNow for NetSuite. Click on each name separately or check the Select All box.

- To configure the types of records for this button, click on the script link right under top pane.

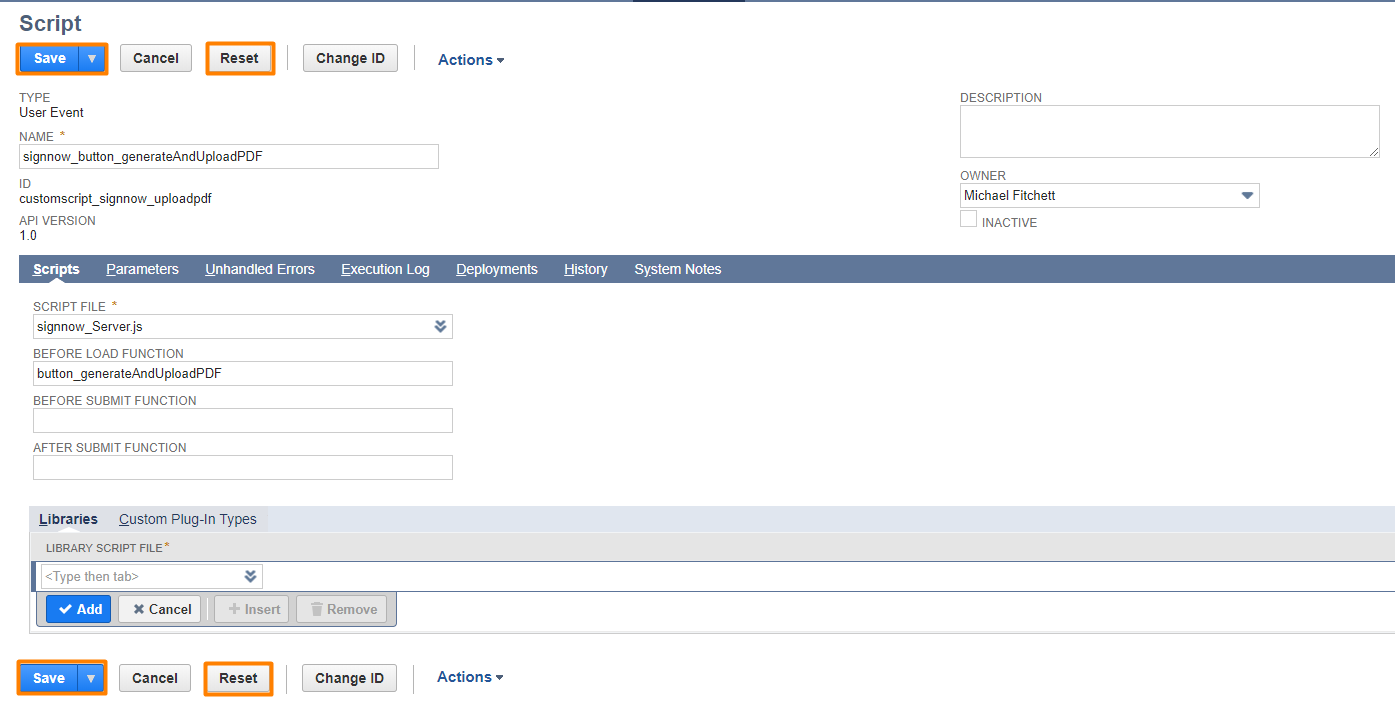
- Click Edit on the next page to change settings for the button script.
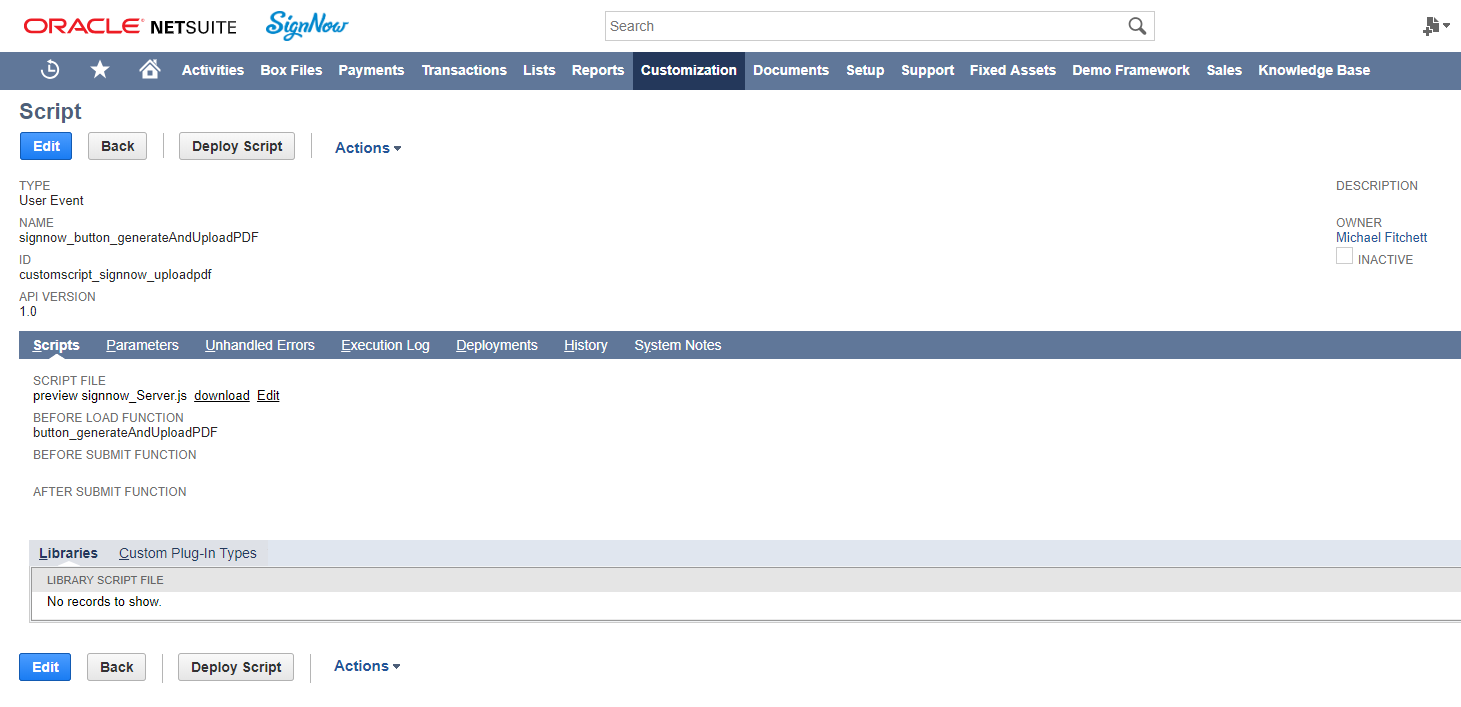
As you can see, almost all the parts of the script are ready for customization.
- NAME: rename the button in this field.
- DESCRIPTION: describe what users can do with this button in this box.
- OWNER: select the owner of this button from this dropdown.
- INACTIVE: deactivate the button by checking this box.
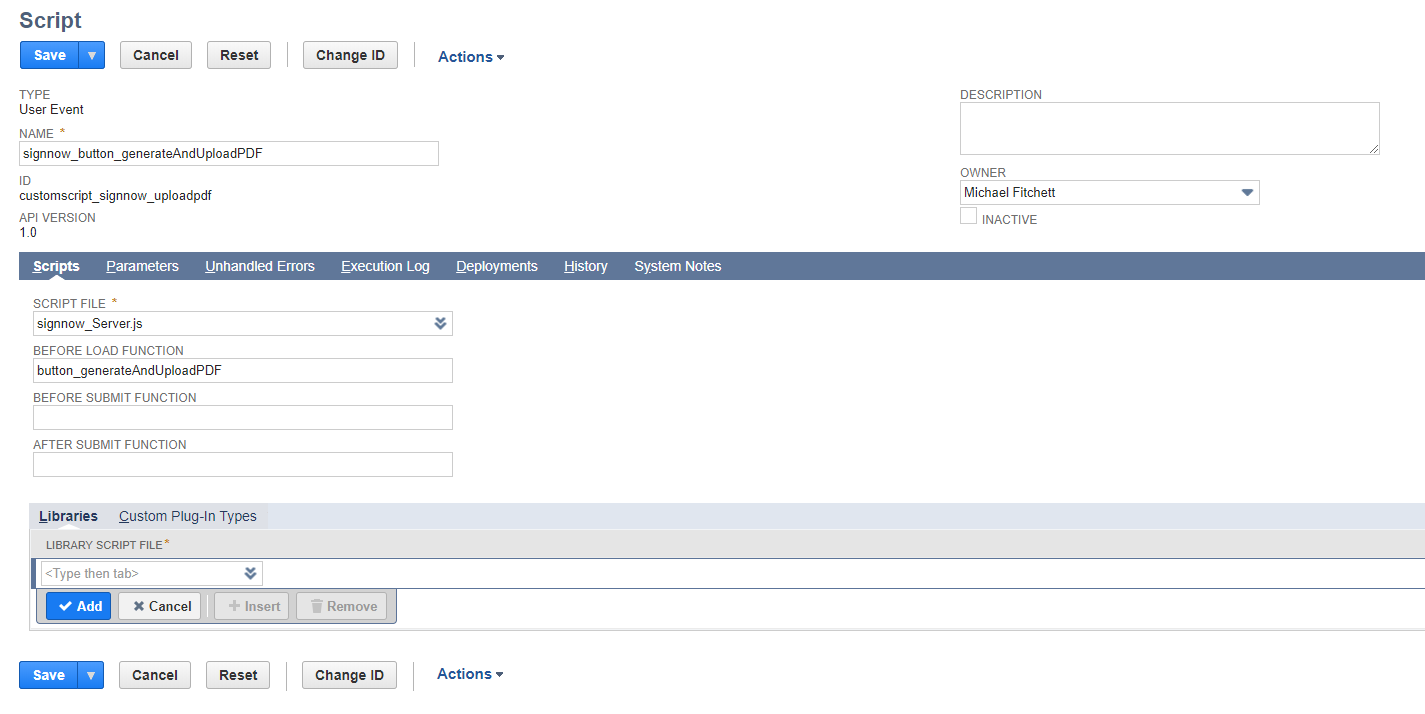
- In the Scripts subtab link another script file if anything went wrong.
- SCRIPT FILE: select a script file from the list under this field.
- BEFORE LOAD FUNCTION: change the function of the button before the load.
- BEFORE SUBMIT FUNCTION: change the function of the button before the submit.
- AFTER SUBMIT FUNCTION: change the function of the button after the submit.
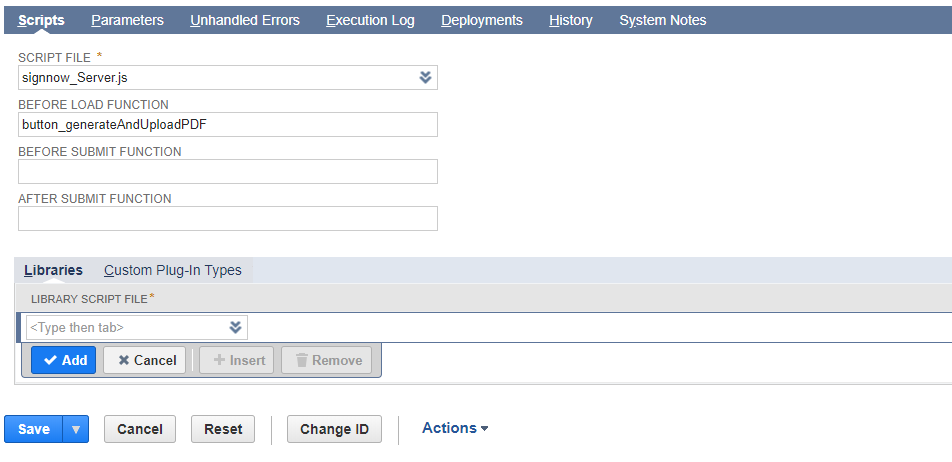
- Under Parameters add NetSuite parameters that will be associated with this button such as email address, currency, hyperlink etc.
Provide a label, ID and description for them in New Parameter.


- Select who will be notified of errors using this button from Unhandled Errors subtab.

- See who used this button and when in Execution Log subtab.

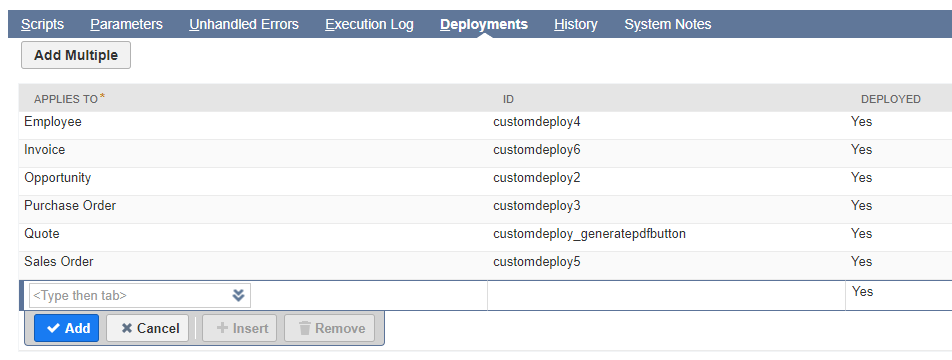
- Add NetSuite objects associated with this button in Deployments subtab. Here you can specify Roles, Departments and Objects.
For example, if you want all employees to use this button add EMPLOYEE to the list, or if you want this button to appear in every Quote or Sales Order, add these objects to the list. Click Add when you’re done. To remove a role or entity from this list, go back to the Audience subtab in Step 2 and uncheck it from the corresponding boxes.
- Track edits in the script under History.
- Check what’s been implemented under System Notes.
- When you finished editing the script, click Save. If you want to go back to default settings, hit Reset.
Updated over 6 years ago
