Create a SignNow Smart Template
To create a SignNow Smart Template, open a simple template in your SignNow account and select or add fillable fields that you would like to associate with the NetSuite value.
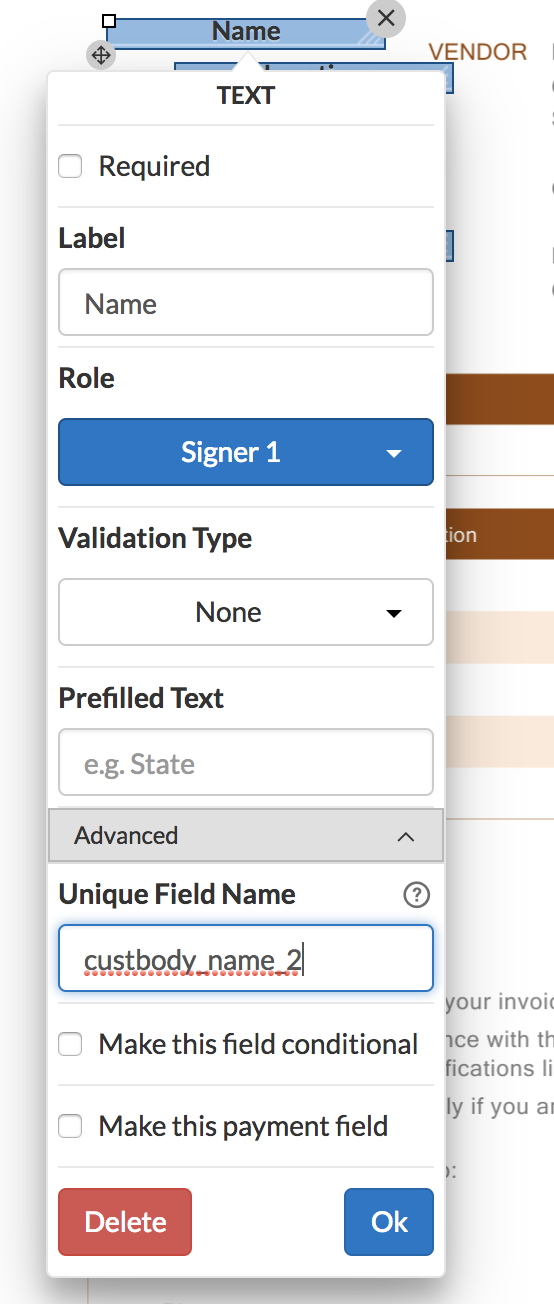
1.Click on the field and go to Advanced Options.
To later prefill automatically any SignNow field with a NetSuite value, give this field a unique name, which copies the Field ID of the internal NetSuite field. In case the Unique Field Name doesn’t match NetSuite Field ID, you have a chance to add the correct NetSuite value manually when generating a document.

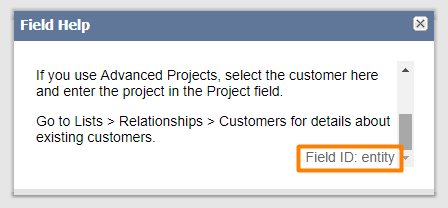
To learn the Field ID in NetSuite, click on the Field name and check the bottom of the Field Help box.

If it’s not there, try hovering over the Home icon and click Set Preferences. In the Defaults section, check Show internal ID and click Save.
If you’re not authorized to set preferences, contact your NetSuite administrator to solve the issue.
Click Ok in the Advanced Options and then Done in the upper right. Now you can start using the SignNow Smart Template in NetSuite.
Note
If you need the same value to be prefilled into several fillable fields, you may want to add a special kind of field in SignNow called Salesforce Field.
For example, if you need you client’s name to appear at the top of your document and in the bottom, next to the Signature field. Drag and drop Salesforce Fields in those places and map them with the same NetSuite Internal Field ID, like custbody_name_2 on the screen.
When you use this Smart Template in NetSuite, it will automatically prefill the Salesforce Fields with connected NetSuite values.
Click Ok in the Advanced Options and then Done in the upper right. Now you can start using the SignNow Smart Template in NetSuite.
Updated over 6 years ago
